Random facts could include their favorite movie, vacation spot, candy, or television show. Regardless of what you choose, it will surprise your caller and more than likely make them leave a message if they were considering hanging up.
how to set up voicemail on iphone after 60 days
Apr 27, 2013 · If the caller needs to a have longer conversation, then they should schedule a meeting or a coffee and have the conversation face to face. Or plan a conference call. Let the phone ring at least 6 times (or until the jump to voicemail occurs). This gives the receiver time to put down what they are doing and come to the phone.
Change my previous comment to “How long does a post remain “awaiting moderation”? I posted the above comment weeks ago.
.
how to set up voicemail for iphone se
Before we proceed with the means to fix your voicemail not working on iPhone, it’s of utmost importance to know if voicemail is set up in the first place.
If voice mail options are grayed out, you're using the Skype for Business voice mail service with cloud PSTN. Voice mail options aren't available in Outlook.
how do i set my voicemail on iphone xr
With notifications, you're alerted when you miss a call or receive a voice mail message. You can decide how and when you want to be alerted. For example, you can receive an email when you miss a call or get a text message when someone leaves a voice mail. By default, you'll receive an email anytime you miss a call, but text messaging notifications are turned off.
Go to the Phone app, then navigate to Voicemail. If you've never set up your voicemail, you'll be prompted to do so. Create a voicemail password and confirm it.
how to setup my voicemail on t mobile
I just tried to set up voice mail and I got a message saying it was not available for users roaming on T-Mobile’s network! Please get this fixed! Something as basic as this should not be an issue. It almost makes want to consider another carrier.
how to set up voicemail message vodafone
at&t how to set up voicemail iphone
how do i setup my voicemail on straight talk
how to set up my voicemail iphone 11
how to setup voicemail koodo
how do i set up voicemail message
how do i set my voicemail on iphone
how to set up voicemail on a iphone 11
how to setup your voicemail at&t
how to set up voicemail message on tracfone
how to set up voicemail message at&t
how to set up voicemail message in jabber
how to set up voicemail for iphone
The professional voicemail greetings is the cornerstone of any good business. Not every voicemail recording is relevant to every situation. This guide is going to demonstrate some of the specific custom voicemail greeting examples for doctors, dentist, real estate agent, lawyers and other professionals. A doctor’s practice typically either has a secretary or the doctor themselves to take calls. It’s vital that you have a different voicemail based on the area of the practice the patient is calling. The information differs, but the tone of voice remains the same. It should be warm yet professional because many patients will be distressed or worried about potential symptoms and conditions.
how do i set up my voicemail on iphone
8 hours agoMessenger Pro Lite for Messages. All your social networks and apps in one app. Save Story for Facebook Stories. Store your favorite Facebook stories on your smartphone. ShareChat. Send your friends a smile through this popular Indian platform. Loops. Share your video and play with people from around the world. [email protected]
Voicemail issues are apparently common across the range of iPhones. I have seen them from the older iPhone 5 all the way up to the iPhone XR. Sometimes it’s not the phone itself at fault, but the network that’s causing the problem. Sometimes it is the phone, and a few simple tricks can get voicemail working again.
From transcription and voice to text to more convenient features of handling multiple phones through one number, availability varies by service. Shared voicemail and call routing is intended for multiple access and directing calls to one or multiple phones. Mobile apps are also available that allow you to check your messages from your phone.
how to set up voicemail on samsung s8 t mobile
Similar to a smart phone, but built just for toddlers, this toy phone lets children call Scout, have playful conversations and receive pretend phone calls and voicemail messages. Explore numbers 0-10 with animations featuring a bunch of objects to count.
“iPhone voicemail error try again later” is a network issue and may prevent you from accessing the voicemail.
If you haven’t set up any voicemail on your iPhone, here’s how to do it step by step!
how to set my voicemail on iphone xr
-Hello? Oh hey wait a minute I can’t hear you… Sorry, hold on… Nope, still can’t hear you. You want to know why? Because I’m not here right now. So leave a message at the beep.
Here, the oncologist is busy consulting a patient, but he/she leaves ways for the callers to fulfill their needs right away. A lawyer’s office needs to maintain professionalism at all times in order to record the perfect voicemail greeting. Let’s look at an voicemail greeting script example.
And remember, while you’re busy returning your calls, Blitz can be automating other parts of your sales process. We can assign leads to your staff or even send emails to your customers.
how to setup voicemail on htc
Anyone who wants to easily save or backup voicemail to their computer or to an external drive. Launch iMazing and connect your device. In the left sidebar, select Phone > Voicemail. To view your most recent data, you may need to refresh your data.
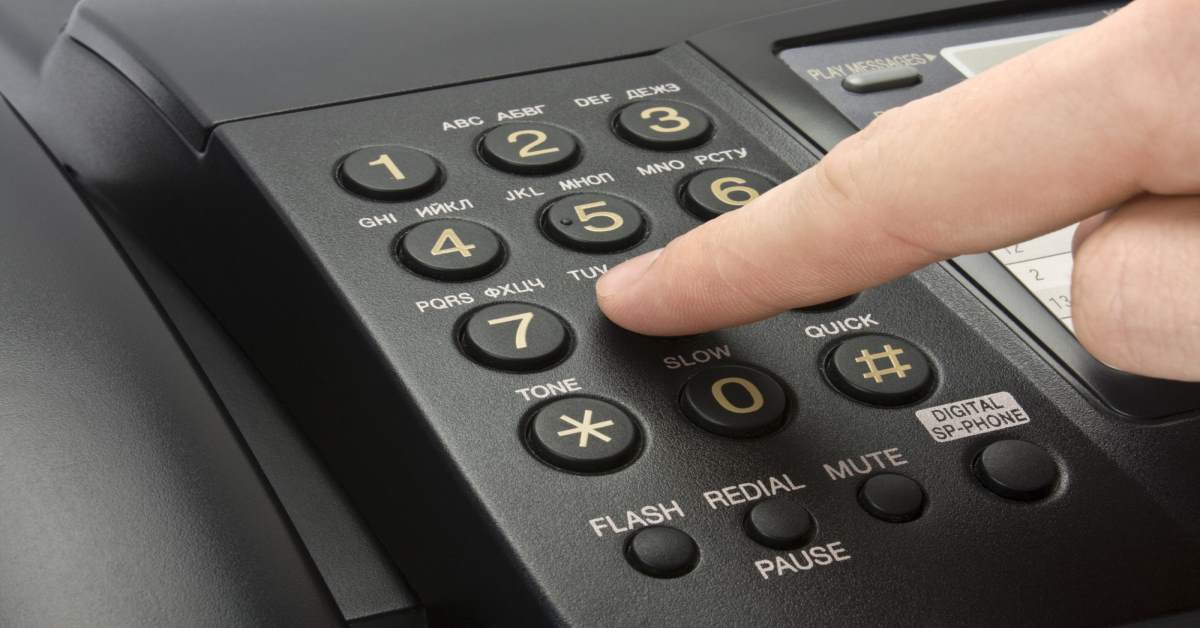
Tap the Voicemail push symbol “one”.Push button “*” for opening the main menuHold “three” number key, enter the greeting menu.Last, push “two” number key to make a fresh welcome recording.
However, most networks do allow you to adjust the length of time that the phone rings before switching to voicemail by dialing in a long code number. On Vodafone this is **61*121*11* followed by the number of seconds and then the hash symbol (#). So to set your phone to ring for 20 seconds you’d dial **61*121*11*20*.
Be Part Of Our Story!
how to set up voicemail on iphone xr10
This article will introduce you how to change voicemail messages/greetings and voicemail number on iPhone 7/SE/6s/6/5s/5c/5/4s/4/3GS. Read below and give it a try. Of course, you can change the voicemail on your iPhone and set it to whatever you want. Your carrier will give you a voicemail box, which has a standard message. You can change the message into anything that you want. You can use your name, and leave a catchy message, and you can even sing a song if you want to. You have a wide range of options when changing your iPhone voicemail settings; you cannot only change the type of message, but also how to retrieve them, when you should be prompted, and a lot more. Part 1. How to Change and Record Voicemail Greetings on iPhone Part 2. How to Change the Voicemail Number on iPhone Part 3. Can I Recover A Deleted Voicemail on My iPhone Setting a voicemail greeting is important when we missed a call and let the people calling you know they have reached out to the right person and remind them to leave a message after the greeting. To record a personalized voicemail greeting, here are the steps that you have to follow. This action will lead you to the voicemail menu on the iPhone, and it will dial the voicemail service offered by your carrier. This is dependent on the carrier and also the plan that you have. You will have to follow the initial process given by the voice prompts from your carrier. This will allow you to record your greeting. If your carrier plan allows visual voicemail, you will see a "Set Up Now" button, which you should tap. Depending on your carrier, you will be asked for a password for your voicemail. Make sure that it is one that you can easily remember. Each carrier has a certain number of digits. You will be asked to repeat the password for it to become effective. Using visual voicemail, you can decide whether to use the "default" greeting or create a "custom" one. When creating a custom greeting, you will be allowed to review it before you confirm the recording. Simply click on the record button, and then click stop when you are done. Once you have reviewed it, you can click on "Save" to set it as your greeting. After you set your personal voicemail greeting, your iPhone dials a number to recover or access your voicemail. In this way, you can change the 9-digit voicemail number by following easy steps: On the keypad, type "*5005*86*0123456789#" – NOTE: "0123456789" is the number to which you want your voicemails to be sent to. Once you have entered the above number, tap the "Call" button, and the new number will be set. All your voicemails will be sent to the new number. That's it. As you can see, it is so easy to change voicemail number on the iPhone. Yes, it's possible to get your deleted voicemail back; losing an important voicemail is bad, but fortunately, we provide 2 possible ways for you to retrieve them back. Let's check them out! Step 2 Scroll down at the bottom of the page, you can see "Delete Messages", please tap on it. Step 3 Find the voicemail that you don't want to delete and tap "Undelete" to retrieve it back. For iPhone users, we recommend you to try dr.fone - Data Recovery to recover deleted messages and voicemail. Here we listed some key features to tell you why you should choose it. It supports all iOS devices: This means that you can use it to recover voicemail on iPhone, iPad, etc. Handy Preview feature: With this feature, you get a preview of the voicemails before recovering them. Full Data compatibility: This tool can access up to 18 different types of data. This makes it very versatile for the recovery of images, video, voicemail audio, and a lot more. Easy to use: The user interface is easy to follow, that even a novice will be able to handle it with ease. Allows for partial recovery: You can select the data that you want to recover. If you only want certain voicemail messages, you only select them and leave the rest. Download and install dr.fone on your computer, and also connect your device to with PC. There are three options list on the next screen; it's you choose one of them to scan the device, you can also choose file types to start scanning. Once you finished scanning, all the data that you deleted have been displayed on the screen. Find the voicemail that you would like to recover. After reviewing the deleted files' results, you can simply recover these files anywhere in your local directory. In this article, you have cleared how to record and change the voicemail number; and provide some solutions to recover deleted voicemail back. I hope you have already recovered your voicemail easily without any further loss. Hot Articles The Best Way to Recover Snapchat Messages on iPhone
how to set up voicemail on iphone with verizon
Besides creating an audio file in the right format (Adaptive Multi-Rate), you also need to trick the iPhone to upload your new greeting to the AT&T servers:
how to set up voicemail message on cisco jabber
4. Save and delete messages. Voicemails will be deleted if the auto-save period is reached. The auto-save period can be from 14 to 30 days, depending on the type of voicemail.
Contact Us
Samsungtechwin.com participates in the Amazon Services LLC Associates Program, an affiliate advertising program designed to provide a means for sites to earn advertising fees by advertising and linking to Amazon.com.
On inbound calls the phone will only ring once the jump to the next step in the call flow whether it is voicemail or another extension. This issue only happens on Monday, by Tuesday it has resolved itself somehow. This is defiantly a pattern as this is the 3rd Monday this has happened on. All 3 customers are running on Linux Debian 9.
By default, the telephone number is the one assigned to you by your organization, but it could also be a cell phone number or email address. In that case, voice mail would be played back through your email Inbox.
Open the Phone app .Tap More options Settings. Voicemail.Turn on Voicemail transcription.
Let us begin with the most obvious. Have you set up visual voicemail on your iPhone?
Category: Cell Phone, Phone Number, Customer Service, Home Phone, Ads Show more
!
how do i setup my voicemail on my phone
how to set up voicemail message on samsung s9
how can i setup my voicemail
how do i set up voicemail message on samsung
Most mobile networks allow you to contact your voicemail system from another phone. This can be handy if your battery is flat, or if you don’t want to rack up extra costs when you’re overseas.
21. "Hello, you've reached [your name, the office of X company]. The team is currently out of the office, but we'll be back on [date] stuffed with good food and eager to speak with you. Leave your name, number, and — if you're so inclined — your favorite [holiday dish, Thanksgiving tradition, etc.]"
4.) Benvenuti dal Signor John Doe. Il Signor Doe non è in ufficio. Si prega di lasciare un messaggio e il Signor Doe vi richiamerà al più presto possibile. Grazie per la vostra chiamata.
Website: https://www.dummies.com/consumer-electronics/smartphones/iphone/how-to-record-a-voicemail-greeting-for-your-iphone/
PCMag.com is a leading authority on technology, delivering Labs-based, independent reviews of the latest products and services. Our expert industry analysis and practical solutions help you make better buying decisions and get more from technology. Reviews Best Products Categories Brands Events Series Encyclopedia Sitemap About PCMag Careers Contact Us Press Center
Apr 27, 2013 · If the caller needs to a have longer conversation, then they should schedule a meeting or a coffee and have the conversation face to face. Or plan a conference call. Let the phone ring at least 6 times (or until the jump to voicemail occurs). This gives the receiver time to put down what they are doing and come to the phone.
att set up voicemail iphone xr
how to set voicemail in iphone xr
set up voicemail ee iphone 7
set up voicemail ee iphone 7
10. "Hello, you've reached [X company]. We can't take your call right now, but please leave your name, contact information, and reason for reaching out, and one of our team members will be in touch within 24 hours."
how to setup my voicemail on iphone 6s plus
Different businesses may require different types of greetings. This is the ultimate list that can work for a wide array of company messages.
If someone takes the time to call and leave you a voice message, they usually have a reason that they are calling. It does convey a certain level of interest when someone is willing to hop on the phone with you. If they were less interested, they would probably send you an email or fill out a form on your website.
Once you click greeting, you can change it from default to custom and record your custom greeting. Press play to listen to it before saving it.
21. Hello, this is [your name]. I’m not much of a phone person, so don’t bother leaving a message. Send me an email at [email address] and I’ll get back to you within 24 hours.
2. Try calling your voicemail directly. Open Phone → Make sure you are on Keypad → Press and hold the number 1 for a few seconds. It will call your voicemail; You can check your voicemails here.
how to set up voicemail message on sony xperia
how to setup my voicemail on iphone 6s plus
how to set up voicemail message on ee
how to setup voicemail tracfone
2 hours agoWith Visual Voicemail you can listen to messages in any order, respond in one click, update your contacts, and easily manage your inbox without ever dialing into your voicemail. No need to change your MetroPCS voicemail number or to reconfigure your voicemail forwarding - Visual Voicemail activates for free at first launch.
All that being said, as voicemail is still thing, and carriers do offer it with every account, iPhones support voicemail. Here’s what you need to know if you want to set it up.
Here are several tips to consider when setting up a professional voicemail greeting: Keep it brief and concise. Give options to get more details. Ask for detailed messages. Be enthusiastic and identify yourself and the company name. Use positive sentences. Take messages accurately and completely. How do I change my voicemail greeting? On your Android device, open the Google Voice app . At the top left, tap Menu Settings. In the Voicemail section, tap Voicemail greeting. Next to the greeting that you would like to use, tap more Set as active. How do I delete my voicemail greeting?
You can also save your Visual Voicemail messages as notes or voice memos, or share them using Messages, Mail, or Airdrop. Published Date: April 30, 2021 Support Set up Visual Voicemail on your iPhone Device Guides / Apple / iPhone 8 / Access voicemail Access voicemail - Apple iPhone 8
5. “Hi, you’ve reached [company name]. We can’t take your call right now but we will call you back as soon as we’re available. Please leave your name, number and reason for your call. We know your time is precious, so to skip the back and forth, kindly leave a few different times of day that work best with your schedule and we will do our best to reach you then! Have a great day.” This greeting lets your caller know that not only your time is precious, but you realize theirs is as well.
Who We Are Our Team CEO Message Why Bralin? Why Us? Client Feedback Case Studies Referral Program Contact Us Our Services Managed IT Services Network Security Email Security Solutions Cloud Consulting Microsoft Office 365 Consulting Technology Advisors Business Continuity Fortress Where We Go Media Centre Our Blog Our Videos Need Help?
set up voicemail message telstra
how to set voicemail on iphone ee
how to setup your voicemail on iphone 11
how to set up voicemail on iphone 6
Phone applications can be accessed from the home screen. Select the Keypad tab, then the Visual Voicemail icon from the drop-down menu. Note: You may also set up voicemail by selecting and holding the 1 key on your phone’s keyboard. Continue is the option.Click on the OK button. What is the procedure for Turning off Voicemail on my Samsung Galaxy S10?
1. Top Voice Training Courses (Udemy) This comprehensive list of voice training courses on Udemy caters to a wide range of vocal practitioners. There are courses that you can take if you are into public speaking and want to create an impact on your audience, thereby retaining them.
Hello! You’ve reached [Natasha on the Product Development Team at LinkedPhone]. I’m not available at the moment but your call is important to me. Please leave your name, number, and the reason for your call and I’ll call you back as soon as possible. Thank you and have a great day!
If even resetting your Network Settings couldn’t yield positive results, it’s time to give your carrier a call or visit them.
Once you’ve set up your voicemail, you’ll be able to turn off your phone whenever you want. 2 Ways to Set-Up a Voicemail In your Samsung Galaxy Series10 Steps to Setup Voicemail Samsung Galaxy7 Steps Required to Create a Personalized Voice GreetingWhat Should I do if I want to change my Voicemail Greeting?How can I listen to my Voice mail messages?Is it Possible to turn off my Voicemail on my Samsung S20?What Is Visual Voicemail?How can I set up my Visual Voicemail?Step-by-step instructions on How to Configure Voicemail on your iPhone.My Final ThoughtsFrequently Asked QuestionsHow to set up voicemail on my Samsung phone?What is the procedure for Turning off Voicemail on my Samsung Galaxy S10?Why is it that my voicemail does not work on Samsung?Khelly Perez
AT&T: If you’re an AT&T customer, you have the option of creating your own basic voicemail. You’ll need to press and hold the 1 key down while you’re on your phone. AT&T will then ask you to set up your greeting via voice prompts.
Your phone system greeting is the first thing callers hear. Set the right tone from the very start with professional greetings.
-Hello. All of our operators are busy right now, but if you’ll leave your name, telephone number, a brief message, and the time you called, we’ll get back to you as soon as possible. Thank you and have a pleasant day.
3.) Questa è la mailbox del Signor John Doe. Si prega di lasciare un messaggio o di richiamare questo numero più tardi. Grazie per la vostra comprensione.
Forget about messing around with apps. There’s a powerful voicemail handling system built into nearly every big carrier today — and that system almost always includes a system for recording a voice message and sending it directly without ringing the target phone. I will walk you through the process of doing this on Straight Talk (since that happens to be my carrier) but most carriers will have similar systems.
About | Privacy Policy | Cookie Policy | Update Consent | Terms & Conditions | Editorial Guidelines | Affiliate Disclosure | Contact Us
how do i setup my voicemail at&t
how to set voicemail message vodafone
how to set up voicemail for samsung j3
Xhow to set up voicemail message on kyocera flip phone