Best Seller in Landline Phones VTech CS6114 DECT 6.0 Cordless Phone with Caller ID/Call Waiting, White/Grey with 1 Handset, 3.50 x 3.50 x 7.00 Inches 4.2 out of 5 stars 19,741
how to set up voicemail with iphone 11
Step 3: After that, you will be presented with the Greeting screen on your iPhone, where you can record a personalized voicemail greeting.
Launch Settings → Cellular → Toggle off Cellular Data → After 30 seconds, toggle it back on. On iPhone X or later, swipe down from the top right of the screen (where the battery indicator is). On iPhone 8 or earlier, swipe up from the bottom of the screen.Tap the plane icon to turn Airplane Mode ON and disable all connections.After 30 seconds, tap the same plane icon to toggle Airplane Mode off.
.
how do i setup my voicemail on my new phone
Hi. I am probably home, I’m just avoiding someone I don’t like. Leave me a message, and if I don’t call back, it’s you.
Step 5: Tap Done to save your greeting, and officially setting up your Visual Voicemail.
how to set your voicemail on iphone 6s
Don’t worry if you lost your Snapchat photos! Here are 3 methods to recover Snapchat photo! You can retrieve Snapchat from iPhone, iTunes and iCloud backup. Powerful Ways to Recover/Retrieve Deleted Call History/Logs on iPhone
Leave me a message, and if I don’t call back, it’s you. Hello, you have reached the number you have dialed. Please leave a message after the beep. Hi, this is [ your name ]. I’m sorry, I can’t answer the phone right now. Leave a message, and then wait by your phone until I call you back.
how to set up a voicemail in iphone
-Hello. All of our operators are busy right now, but if you’ll leave your name, telephone number, a brief message, and the time you called, we’ll get back to you as soon as possible. Thank you and have a pleasant day.
how to set up voicemail on samsung a10 phone
how to set up voicemail on iphone spectrum
how to set up voicemail in iphone se 2020
how to setup your voicemail on iphone 7
how to setup your voicemail on iphone xs max
how to set up voicemail on a samsung j3
how to set up voicemail on iphone 8 after 60 days
how do i setup my voicemail on my iphone x
how do i setup my voicemail with verizon
how to setup your voicemail on iphone 8
how to setup your voicemail on iphone 6
how to set up voicemail on iphone se t mobile
how to set up ee voicemail on iphone 6
You are here:Home»iPhone»Phone»My iPhone Won’t Play Voicemails! Here’s The Real Fix For Verizon, AT&T, & T-Mobile.
how do i setup my voicemail on galaxy s5
Rev, our top-rated transcription service, offers an app to facilitate recording incoming and outgoing calls by merging in a Rev recording number on a 3-way call. You access the recordings in the Conversations area of the app.
Dial your voicemail box number you want to record. Grab your mobile phone and dial your voicemail box number, and key in your login credentials. 5. Start to record. Go and click the Start button on the recording tool few seconds prior playing your voicemail.
Thank you for reaching out to us. This is something our technical teams are already working. For now. you can call “123” to access your voicemail.
how to setup voicemail on iphone 8 plus
For small businesses, there are a variety of voicemail service providers you can use that offer different features. From transcription and voice to text to more convenient features of handling multiple phones through one number, availability varies by service. Shared voicemail and call routing is intended for multiple access and directing calls to one or multiple phones. Mobile apps are also available that allow you to check your messages from your phone. The below infographic outlines the current state and trends of voicemails.
Step 7: If you want to record all the calls you make or receive, select the All numbers option. If you wish to record calls from the numbers that are not saved in your contacts, select the Unsaved numbers option. You can even choose some select numbers manually that you wish to record calls to and from by clicking the Selected numbers option, then tapping Auto record numbers, and then add the numbers that you desire by typing them manually or adding those numbers from your Recents or Contacts lists.
So make sure you connect with them to make sure you have it. If you don't see that play on the record and that way you'll just have to basically record and use a different device to call them yourself, to hear your voicemail. I hope you found this useful. Please give it a thumbs up and subscribe to this channel for easy-to-follow, how-to videos, and tech videos, just like this one and I'll catch you next time. Thanks for watching.
how to setup my voicemail iphone 6s
If you drone on and on, there is a good chance that some of your callers are going to hang up before leaving their message.
This guide will show you how to access your voicemail and activate call forward to your voicemail. 4 If your voicemail is not set up, select Add number Samsung Galaxy A40 Android 9.0 Change device Guides User manual Specifications Compare Device Guides is offered to MNOs and MVNOs by Mobilethink & Tweakker
Note: If you change any of your single digit options (press 1 for sales, 2 for accouting, etc.) you must have a technician connect to the voice mail and altar your Night Menu programming.
how to setup voicemail iphone rogers
Forward your voicemail. Your forwarded voicemail transcripts will show up in your email app. On your Android device, open the Google Voice app . At the top left, tap Menu Settings. Under "Voicemail," turn on Get voicemail via email. Give feedback about this article. Choose a section to give feedback on.
It offers FREE voice mail greetings for the different people that call your cell phone. It's called youmail. This youmail service can replace your cellular voicemail with a supposedly better voice mail system that includes a set of cool and different features such as different personalized greetings for each caller, online and phonebased
This works for any call, live conversation, or endless Zoom call. On a second device—be it another iPhone, an iPad, laptop, or Android phone—open a voice-recorder app and hit record while you're talking. On iOS, the built-in version is called Voice Memos; we have a full tutorial on how to use it. Windows 10 has a built-in Voice Recorder. Android has a bunch of them.
Be Part Of Our Story!
how to set voicemail on iphone xs
4. Waiting Message. What callers hear when they enter the waiting queue. Sample Scripts: “All of our agents are currently busy. Please hold and we will answer your call as soon as possible.”
how to setup your voicemail on iphone 7 plus
Your clients don’t have a lot of time, and neither do you. Use the following short voicemail greetings to get to the point quickly and invite them to leave a message.
how to set up voicemail on iphone 8 fido
This article will introduce you how to change voicemail messages/greetings and voicemail number on iPhone 7/SE/6s/6/5s/5c/5/4s/4/3GS. Read below and give it a try. Of course, you can change the voicemail on your iPhone and set it to whatever you want. Your carrier will give you a voicemail box, which has a standard message. You can change the message into anything that you want. You can use your name, and leave a catchy message, and you can even sing a song if you want to. You have a wide range of options when changing your iPhone voicemail settings; you cannot only change the type of message, but also how to retrieve them, when you should be prompted, and a lot more. Part 1. How to Change and Record Voicemail Greetings on iPhone Part 2. How to Change the Voicemail Number on iPhone Part 3. Can I Recover A Deleted Voicemail on My iPhone Setting a voicemail greeting is important when we missed a call and let the people calling you know they have reached out to the right person and remind them to leave a message after the greeting. To record a personalized voicemail greeting, here are the steps that you have to follow. This action will lead you to the voicemail menu on the iPhone, and it will dial the voicemail service offered by your carrier. This is dependent on the carrier and also the plan that you have. You will have to follow the initial process given by the voice prompts from your carrier. This will allow you to record your greeting. If your carrier plan allows visual voicemail, you will see a "Set Up Now" button, which you should tap. Depending on your carrier, you will be asked for a password for your voicemail. Make sure that it is one that you can easily remember. Each carrier has a certain number of digits. You will be asked to repeat the password for it to become effective. Using visual voicemail, you can decide whether to use the "default" greeting or create a "custom" one. When creating a custom greeting, you will be allowed to review it before you confirm the recording. Simply click on the record button, and then click stop when you are done. Once you have reviewed it, you can click on "Save" to set it as your greeting. After you set your personal voicemail greeting, your iPhone dials a number to recover or access your voicemail. In this way, you can change the 9-digit voicemail number by following easy steps: On the keypad, type "*5005*86*0123456789#" – NOTE: "0123456789" is the number to which you want your voicemails to be sent to. Once you have entered the above number, tap the "Call" button, and the new number will be set. All your voicemails will be sent to the new number. That's it. As you can see, it is so easy to change voicemail number on the iPhone. Yes, it's possible to get your deleted voicemail back; losing an important voicemail is bad, but fortunately, we provide 2 possible ways for you to retrieve them back. Let's check them out! Step 2 Scroll down at the bottom of the page, you can see "Delete Messages", please tap on it. Step 3 Find the voicemail that you don't want to delete and tap "Undelete" to retrieve it back. For iPhone users, we recommend you to try dr.fone - Data Recovery to recover deleted messages and voicemail. Here we listed some key features to tell you why you should choose it. It supports all iOS devices: This means that you can use it to recover voicemail on iPhone, iPad, etc. Handy Preview feature: With this feature, you get a preview of the voicemails before recovering them. Full Data compatibility: This tool can access up to 18 different types of data. This makes it very versatile for the recovery of images, video, voicemail audio, and a lot more. Easy to use: The user interface is easy to follow, that even a novice will be able to handle it with ease. Allows for partial recovery: You can select the data that you want to recover. If you only want certain voicemail messages, you only select them and leave the rest. Download and install dr.fone on your computer, and also connect your device to with PC. There are three options list on the next screen; it's you choose one of them to scan the device, you can also choose file types to start scanning. Once you finished scanning, all the data that you deleted have been displayed on the screen. Find the voicemail that you would like to recover. After reviewing the deleted files' results, you can simply recover these files anywhere in your local directory. In this article, you have cleared how to record and change the voicemail number; and provide some solutions to recover deleted voicemail back. I hope you have already recovered your voicemail easily without any further loss. Hot Articles The Best Way to Recover Snapchat Messages on iPhone
Contact Us
Some MacBooks automatically adjust the screen brightness level, and it's a pain. Here's how to turn that feature off. Facebook promised Trump it wouldn't fact-check political speech, according to a new book
how to setup my voicemail on iphone 7 plus
-Hello. All of our operators are busy right now, but if you’ll leave your name, telephone number, a brief message, and the time you called, we’ll get back to you as soon as possible. Thank you and have a pleasant day.
Setting Up Voice Mail iPhone 7 Tutorial iPhone 7 to Set Up Voice Mail on iPhone 7 is some an easy guide. The first time you tap Voicemail, you're prompted to create a voicemail password and record your voicemail greeting. Listen to a voicemail message on iPhone 7 Tap Voicemail, then tap a message. To listen again, select the message and tap
7. For extra security, back up your newly recorded voicemails to a storage service like Dropbox or Google Drive, both of which offer free space. The Leadership Brief. Conversations with the most influential leaders in business and tech. Please enter a valid email address. * The request timed out and you did not successfully sign up. Please attempt to sign up again. Sign Up Now An unexpected error has occurred with your sign up. Please try again later. Check here if you would like to receive subscription offers and other promotions via email from TIME group companies.
Yes, it will dial the voice mail but then the recorded voice gives you various options.
Yes. However, if you reach the Data Cap limit, your chargeable data roaming usage will be barred and you can’t use the data service unless you purchase an add-on or unblock your data cap.
http://www.ezrasvoice.com/ Cell Phone Voicemail Greetings can easily be created using this blueprint. While all Cell Phone Voicemail Greetings will be uniq
!
how do i setup my voicemail message
how to set up voicemail on iphone 8 consumer cellular
how to set voicemail message vodafone
can not set up voicemail on iphone
Apple expert and novelist, Michael Grothaus has been covering tech on KnowYourMobile for the best part of 10 years. Prior to this, he worked at Apple. And before that, he was a film journalist. Michael is a published author; his book Epiphany Jones was voted as one of the best novels about Hollywood by Entertainment Weekly. Michael is also a writer at other publications including VICE and Fast Company. Facebook Twitter LinkedIn Mix Reddit WhatsApp Flipboard Pinterest More
If they are calling without an expectation that you always pick up (such as if you are a business coach or a one-man shop) then thanking them for calling might make the most sense.
Step 5: When you are satisfied with your recorded greeting, click the ‘Done button.
Some MacBooks automatically adjust the screen brightness level, and it's a pain. Here's how to turn that feature off. Facebook promised Trump it wouldn't fact-check political speech, according to a new book
A special high five to Margot Howard for her outstanding research and contributions to this article. We love working with and supporting like-minded entrepreneurs who are passionate about business success strategies. Thank you Margot! ❤️
Hello… pause. Hello… long pause. Who is this? long pause again Is anyone on the line?…long pause and beep sound.
how to set voicemail message telstra
how to set up your voicemail on iphone 11
google how do i setup my voicemail box
how to set up voicemail on iphone when it says call voicemail
Your voicemail PIN can be any number 4 to 15 digits long. Be sure to make note of it because you'll need it to access your messages in the future.
how to setup a voicemail t mobile
Voicemail transcription (beta; available only in certain countries or regions) shows your messages transcribed into text. Transcription is limited to voicemails in English received on your iPhone with iOS 10 or later. Transcription depends on the quality of the recording.
Apple expert and novelist, Michael Grothaus has been covering tech on KnowYourMobile for the best part of 10 years. Prior to this, he worked at Apple. And before that, he was a film journalist. Michael is a published author; his book Epiphany Jones was voted as one of the best novels about Hollywood by Entertainment Weekly. Michael is also a writer at other publications including VICE and Fast Company. Facebook Twitter LinkedIn Mix Reddit WhatsApp Flipboard Pinterest More
We’ve discovered multiple methods to bypass those troublesome phone conversations, allowing you to simply leave a voicemail and carry on with your day.
You should now be familiar with the entire procedure for setting up voicemail on an iPhone.
Business voicemail greetings are likely to vary by company. Consider these specifics to create a professional voicemail greeting that works for your needs.
how to set up voicemail message on zte phone
how do i setup my voicemail for at&t
how do i setup my voicemail on a tracfone
how to set up voicemail message on samsung a30
Download and install Slydial onto your phone.Sign up for an account and log into the app.Dial 267-SLYDIAL to connect to the service.Enter the cell number you are trying to reach when prompted.Leave your message.See More....How do you set up a voice message?
It drives me mad when I get put through to someone’s voicemail system – only to hear a message telling me that the voicemail-box is full, so I should just bugger off and leave them alone. The number of messages that your voicemail system can store will vary from network to network – Virgin provides a free voicemail option that stores just 10 messages at a time, but you have to pay extra for its VoiceMail Plus service, which stores up to 30 messages.
In sales, immediate communication with your prospects and current customers is important. Being available to answer questions or further negotiate a deal allows your clients to feel secure and more apt to purchase from you. But what if you can’t answer the phone when they call? Make sure you have a voicemail system set up so your clients have the opportunity to leave you a message.
Professional voicemails are important, because they’re an extension of your personal brand, reflecting what level of professionalism you offer. Use these voicemail greetings for work or personal cell phone messages for your specific needs. You can choose a voice that will best suit your business and will deliver a warm and professional voice message. Your callers don’t want to hear a cold and indifferent machine voice. The information you want to put in your voicemail should be succinct enough for your callers to get every bit of information they need. Leave the relevant information in a clear and precise manner. Professional voicemail greetings for work should be informative. The first message the customer hears should have the company’s name so they can be sure they’ve reached the right number. Be courteous and informative. This could be their first point of contact, and you want it to be enjoyable. You may also like 30 Best Wishes and Congratulations for New Business Adventures If you’re going to make your voicemail message humorous in some way, it should be tasteful and aligned to your brand. It shouldn’t get in the way of giving customers enough information when they call. Your voicemail greetings for work should be welcoming and friendly but not too informal. Customers want to feel confident that they’ve contacted a professional, that the company values their call, and they have made the right choice. So be friendly but not too nonchalant. Your voicemail greeting should be clear, concise and to-the-point. You don’t have to put your clients through a sales pitch when they are trying to just get some information.
Visual voicemail is an easy way to check your missed messages. You can see a list of voicemails along with the date it occurred and the length, and you choose which calls to listen to and delete.
There is no definitive answer here, but you should include one of the two at the beginning of your message based on what makes the most sense.
how to set up voicemail for samsung galaxy
how to set up voicemail on samsung pro
how to setup voicemail on iphone xs
how to setup your voicemail on a tracfone
Are you struggling to come up with a voicemail greeting that you believe in? Do you find that everything you record comes out too casual, overly professional, or doesn’t seem to touch all of the bases that you want it to?
Category: Training Courses, Online Courses, E-learning Courses, It CoursesShow more
When starting a Voice Recording you can choose between 3 different recording modes, you can select either Standard, Interview or Speech-to-text. When using Interview mode the sound is amplified from the top and bottoms of the device and reduces the sound from the sides. This mode works effectively when recording sounds in a noisy surrounding.
Lecia has provided thousands of voicemail greetings, auto attendant messages, On-HOLD Messages, and IVR Voice Prompts recordings for small business owners and large corporations worldwide. Your voicemail greetings and messages can be recorded in most any format that is compatible with your phone system, such as .wav or mp3 files.
Hello! This is [Nick on the West Coast Sales Team at LinkedPhone]. I am currently on vacation until [Friday, April 22nd] with limited access to email. If you require urgent assistance, please contact my lieutenant [Harold Kisp at 415-555-1212 or [email protected]]. Otherwise, please leave a message and I will return your call when I’m back in the office. Thank you and I look forward to chatting!
29. Hi, this is [your name] at [X company]. I am on vacation right now and won’t be back to the office until [X date]! Please leave me your name, phone number, and the reason you are calling, and I will get back to you then. Alternatively, you can phone [Name] at [phone contact information]. Thank you for calling!
how to setup voicemail jabber
how to setup voicemail jabber
how to set up voicemail message on samsung galaxy a20e
how to set up voicemail in iphone 11
If your carrier supports the iPhone voicemail feature, you can retrieve and listen to your voicemail right from within the “Phone” app and call your contacts back by simply tapping their messages. That type of functionality is pretty neat and useful, because it saves you actual time. If not supported by your carrier, you will not be able to see the visual overview of your voicemail inbox and use any of the related features. Tapping the “Voicemail” tab in your “Phone” app will simply call the number associated with your voicemail box. So let’s get going with creating our custom voicemail greeting on iPhone! How to record your own Voicemail on iPhone Phone → Voicemail → Greeting → Custom → Record → Save
Step 8: All call recording audio files can be found in the My Files app in Internal Storage > Call folder. You can also view all call recordings from the Phone app by going to Phone app > 3-dot menu button > Recorded Calls.
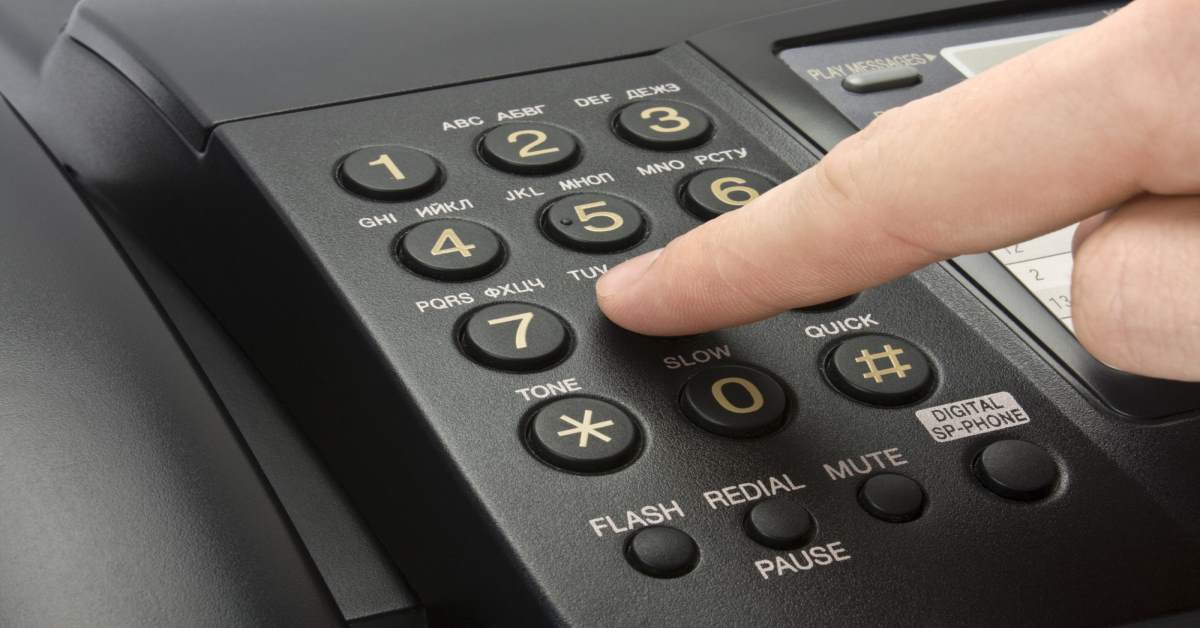
Step 2: It will prompt a phone call to the voicemail service. Follow the prompts and do what the voice tells you too.
People have short attention spans these days, and you should always craft your communications for the lowest common denominator with something as universal as your voicemail.
Open your phone’s voicemail app, then tap (or in some cases, tap and hold) the message you want to save. You should be presented with a list of options; the save option will usually be listed as “save”, “save to phone,” “archive,” or something similar.
Leave me a message, and if I don’t call back, it’s you. Hello, you have reached the number you have dialed. Please leave a message after the beep. Hi, this is [ your name ]. I’m sorry, I can’t answer the phone right now. Leave a message, and …
how do i setup my voicemail on my lg phone
how to set up a voicemail on iphone t mobile
how to set up voicemail on samsung j7 phone
Xhow to set up voicemail message on kyocera flip phone