4. "Hello, you've reached [your name and title]. I'm currently out on parental leave until [date]. In the meantime, please direct all phone calls to [alternate contact name] at [phone number] and emails to [email address]. Thanks, and I'll see you in [month you'll be back in the office]."
how to setup your voicemail on android
Step 3: Eventually, you will be asked to enter a password and record a greeting. Once all that is complete, your voicemail will be set up.
Answer (1 of 2): Press and hold “1” on the dialer of any phone (Android, iPhone, flip phone, old Nokia brick…) and it will call the voicemail system. If you have not set up the voicemail yet, you will be prompted to set up your voicemail as soon as your call to the system is connected. You will
.
how to set up voicemail message on android
On your Android device, open the Google Voice app .At the top left, tap Menu Settings.In the Voicemail section, tap Voicemail greeting.Next to the greeting that you would like to use, tap more Set as active. To change your voicemail greeting: Go to Phone > Voicemail and tap Greeting. Then follow the prompts to change the greeting. To change your voicemail password: Go to Settings > Phone > Change Voicemail Password and then enter the new password you want to use.
44. Hello, you’ve reached [X department] at [X company]. Our team is currently out of the office, but we’ll be happy to assist you when we return. Leave a quick message that includes a callback number and a team member will reach out within one business day.
how do i setup my voicemail android
Voicemail is system that allows you leave voice messages and receive these voice messages. In this article you will five ways to set up Voicemail on your iPhone. It is not a surprise to find an iPhone user, who does not know where to get this Voicemail system on iPhone. So where do you find Voicemail on your iPhone? It is so easy. On the home screen of your iPhone, click on “Phone” app. You will then see the Voicemail icon on the bottom left. To create passwords and customized greetings you will have to tap on. You can also retrieve your messages with ease once you do a setup on your phone. Now lets us look at 5 ways to setup voicemail on iPhone 7, SE, 6s, 6, 5s, 5c, 5, 4s, 4 and 3GS. Part 1: Guide for AT&T iPhone Voicemail Setup Part 2: Guide for Verizon iPhone Voicemail Setup Part 3: Guide for T-Mobile iPhone Voicemail Setup Part 4: Guide for Vodafone iPhone Voicemail Setup Part 5: Guide for Sprint iPhone Voicemail Setup Part 6: Best Tool to Recover Lost Voicemails from iPhone AT&T mobile data plans allows you to setup voicemails on your iPhone with ease. However, you cannot do this connection when you are connected to Wi-Fi. Here is well-explained guide on how to enable the voicemail on iPhone. Step 5. Confirm the password by re-entering the password and then tap on “Done”. Step 6. Create a greeting message. You can set a default AT&T greeting message. On the other hand you can record a greeting message. After that click on “Done”. Verizon network understands the importance of your voicemail messages and allows you to setup voicemail on iPhone with ease. Below are baby steps on how to setup voicemail on your iPhone. Step 2. On the bottom right click on “Voicemail” button. At this point you can be connected to Voicemail system directly via a call, which will then prompt to create a greeting message. If not you need to step up by going to step 3. Step 4. Provide a password. Enter a 4- 6 digit long password and tap on “Done”. Step 6. Next you need to create a message greeting. Click on “Custom” to record your message. Alternatively you can opt for Verizon “Default” greeting if you wish. Record your customized greeting and Save the settings. Your Verizon Voicemail is now activated. You have successfully set up voicemail on iPhone. On T-Mobile carrier, it is also possible to setup voicemail on your precious phone. It only takes steps to setup voicemail on T-Mobile. Below are simplified steps for you to follow. Step 3. Next tap “Set Up Now" and then enter a 4-10 digit password and tap on “Done”. Step 5. Next create a greeting message. You can set a T-Mobile Default setting or you can also record a greeting message by tapping on “Custom”. Thereafter, click on “Done”. Step 6. Record your T-Mobile greeting Message and click “Save”. Bravo your Voicemail is now enabled. UK’s Vodafone network also allows you to receive and send voicemail messages on your iPhone. First, you need to do a set up and below are simple steps that lead to Voicemail activation. Step 2. Listen to the instructions and create a security password of 4-10 digits. It does not accept sequential numbers or repeated numbers. So you need to be creative. Step 5. That is all. If you want to do more customization you can stay connected to do so. For iPhone users connected to Sprint, follow these steps to setup voicemail on iPhone. Step 4. Create a password of about 4-10digits long and the tap on “Done”. For new users, it is recommended that you use the last 7 digits of your phone number. Step 6. Next create a personal greeting. There is a Sprint Default greeting or you can tap custom to personalize your greetings. After that click on “Save”. Congrats, you have now setup Sprint Voicemail and you will start receiving voice messages. Part 6: Easily Recover Deleted Voicemail from iPhone (iPhone X and iPhone 8 Suppported) Once you have setup voicemails on your iPhone, you will begin to receive Voice Messages on your iPhone. These messages are important and it is good for keeps. In some cases your phone may crash and you end up losing these vital messages. You could also format your phone or upgrade it and you will misplace this read and unread Voice messages and also Voice calls. If any of this befalls you, you need to look for iPhone data recovery software. One of the comprehensive softwares is dr.fone - iOS Data Recovery. This software supports different data loss cases and recovers over 20 data types including Voicemails, Voice Memos and much more. It is also software that works with most iOS (including iOS 11) devices. It restores lost data when your phone crashes, system crash, jailbreak failure, upgrade failure, virus attack and reset formatting. It has three modes of data recovery, which are; Direct recover from iOS, Recover from iTunes and Recover from iCloud. It allows you to preview recovered files before selectively recovering them. It recovers many data types like Calendar, call history, Camera Roll, Contacts, Reminder, Voice Memo, Voicemail, App Video, App Photos, App Documents videos, Photo stream, Safari Bookmark, Facebook Messenger, Notes, Messages, etc. It supports any of iOS (iOS 12 supported) device, including iPhone XS/XR/X/8 (Plus)/7 (Plus)/SE/6s (Plus)/6(Plus)/5S/5C/5, iPad and iPod touch. Step 3. Preview the data, choose to recover data to a computer or restore to the device. From the post above, you'll find it quite easy to get voicemail on your iPhone. To some degree, due to the fact that you think setupping voicemial is essential for you, thus reading this guide. Therefore, I do hope that you well save the important messages. If something goes wrong, like losing them by accident, don't panic! dr.fone will come to rescure and perfectly get them back. How to Set up Voicemail on iPhone 12 Pro, 12Pro Max, 12Mini,11 Pro, Pro Max, Max, X/ 8 Plus/ 7 Plus/ 6S Plus/ SE/ 5S
Please leave your name and telephone number after the beep. Thank you for calling. You have reached the office of James Bucki. I can’t take your call right now, but if you leave me a message after the tone, I will return your call as soon as I can.
how to setup voicemail on iphone 8 plus
If that doesn’t work, you may need to either live with the voicemail notification just sitting there, or you may need to try a full reset of your iPhone. It is a step of last resort but can fix most problems with iOS so maybe worth a try. Just remember to back up your phone if you decide to give it a try.
how to set up a voicemail on iphone 11 pro
how to set up voicemail iphone se
how do i setup my voicemail for the first time
how to set up voicemail on iphone xs max att
how do i setup my voicemail on my android phone
how to setup voicemail xfinity
how to set up voicemail on the iphone 11
how to set up my voicemail iphone 11
how to setup your voicemail iphone 7
how to setup your voicemail box on iphone
how to set up a voicemail for iphone 6
how to setup your voicemail on iphone 6
how to setup my voicemail on iphone 11 pro
My iPhone rings for 15 seconds – which is actually eight rings – before it goes to voicemail, but even that’s not long enough if I’ve put the phone down in another room or it’s zipped into a pocket in my jacket.
how to setup voicemail on iphone vodafone
A death announcement email about a colleague is likely to have an effect on staff and... dating advices social etiquette tips thank you messages work tips career advice business email writing words to describe instagram captions words to parents words to friends birthday wishes motivational words love texts for him marriage advice sympathy what to say holiday greetings job interview tips love texts for her good luck wishes good excuses wedding tips Workplace 20 Good Excuses to Miss Work on Short Notice That Keep You out of Trouble
If you haven't used that free Google Voice account in a while, check it out. It provides free voice mail, a free phone number, call-around service (it'll ring as many IRL phones as you want it to until you answer), and yes, even conversation recording on incoming calls. While it's possible to make an outbound call using the Google Voice app on your iPhone, you can't record them with Google Voice.
Of course, this option is only available for those brave enough to hack their iPhone.
how to set up voicemail message on samsung s10
Company-level calls are usually directed to your general business number. There are occasions when everyone in the office is tied up and unable to pick up calls. It’s important to gather information about the reason for the call so that the right person or team can call them back. These greetings ensure that customers do not feel neglected while also providing assurance that their call will be attended to as soon as possible.
Cannot delete 1 999 476-5752 from my iphone 6 with ios 12 voice mail. *86 reports no voicemail. The recording has an Asian language message. I have tried network resets with no success in deleting the voicemail.
Your network can be the culprit causing the issue for the application. Sometimes, the network can be blocking the application usage for your phone. Several users solved this issue by resetting their network settings. Resetting network settings will renew all the information related to the network that you are using on your phone. You can reset the network settings by following the steps below:
how to set up voicemail message giffgaff
A normal-looking Lightning cable that can used to steal data like passwords and send it to a hacker has been developed, Vice reports. The "OMG Cable" compared to Apple's Lightning to USB cable. The "OMG Cable" works exactly like a normal Lightning to USB cable and can log keystrokes from connected Mac keyboards, iPads, and iPhones, and then send this data to a bad actor who could be over a...
12. “Hello, you’ve reached the Customer Support department at [company name]. We are unable to take your call at the moment. We know your time is valuable so instead of placing you on hold, let us call you back! Please leave your name, phone number, the reason for your call, and two different times that are convenient for you to receive a call back from us. Thank you!” Get a better idea of your caller’s schedule by asking them for a few different times you can call back. Their time is important, too!
Want more sales templates? Let our automated software simplify your sales process. Sign up for a LIVE Demo of our lead management software and turn more leads into customers with less work!
how to setup voicemail for verizon
Phone → Voicemail → Greeting → Custom → Record → Save. So far you probably had a generic voicemail greeting on your iPhone and want to change it to a personal voicemail greeting and with most carriers you don’t even need an additional voicemail recording app and can record a custom voicemail greeting directly on iPhone. Record
New voicemail & password setup. Make sure to set up your voicemail within 60 days of activation or it’ll be automatically removed from your account. From your wireless phone, press and hold 1 or the Voicemail key. Select your language preference. Create a 7 to 15-digit password. Select your preferred greeting.
Open the Phone app .Tap More options Settings. Voicemail.Turn on Voicemail transcription.
Be Part Of Our Story!
how to setup voicemail iphone x
In those cases, you might like to save that voicemail somewhere other than your phone for safekeeping or sharing.
how to setup my voicemail on iphone 6
You are here: Home / User Manual / How to set up voicemail on Samsung S10, S10 Plus and S10e
how to set up voicemail iphone cricket
After creating, the Voicemail Greeting, you can test it by calling to your number from another phone, and see if it is playing correctly or not. Open the Phone App. On the lower screen, tap on the Voicemail option. Select Custom, with this option, you can record the personal voicemail greeting on the iPhone. Tap Record, to start recording the voicemail greeting message on the iPhone. Greeting samples are given in this article below, Once you are done with recording, tap Play to listen. Lastly, if everything is alright, and custom voicemail recording is perfect, then tap Save.
Contact Us
The Phone app's Voicemail menu will let you record a custom greeting that you can edit at any time. If you want to check that you set up your voicemail correctly, call …
how to setup a voicemail vodafone
You can do this with lots of third-party voice recorder apps as well, like Rev Voice Recorder, Otter, and Alice, which offer some transcription. Usually for a price. The downside to this method is the quality could be sketchy. Plus, lots of people hate talking to someone on speaker phone.
30. Hello, you’ve reached [your name]. I’m currently out of the office and will return on [X date]. If your call requires urgent attention, please call [Name] at [phone number] and they’ll be happy to assist you. If not, leave a message and I’ll return your call when I get back.
Website: https://www.upphone.com/learn/how-to/iphone-lh/phone-lh/how-to-set-up-visual-voicemail-on-your-iphone/
We use cookies to personalize content and ads, to provide social media features and to analyze our traffic. We also share information about your use of our site with our social media, advertising and analytics partners. Search Get in touch
As mentioned above, alerting callers that they won’t be getting an immediate call back is of upmost importance for an entity’s reputation and a caller’s satisfaction.
Hello, this is (name). I am sorry I can’t come to the phone right now. Leave your name, number, and a short message after the beep. Oh and please do wait by the phone till I call you back. Bye.
!
how to set up voicemail iphone
how to setup voicemail with verizon
how to setup your voicemail greeting
how to set voicemail on iphone ee
4.) Bem-vindo ao Sr. John Doe. Sr. Doe está ausente de sua mesa no momento. Por favor, deixe uma mensagem que o Sr. Doe possa ligá-lo de volta o mais rápido possível. Muito obrigado pela sua chamada.
I’ve got you covered. I’ve compiled some of the best voicemail greetings you can use for virtually any situation you’ll come across.
This article will introduce you how to change voicemail messages/greetings and voicemail number on iPhone 7/SE/6s/6/5s/5c/5/4s/4/3GS. Read below and give it a try. Of course, you can change the voicemail on your iPhone and set it to whatever you want. Your carrier will give you a voicemail box, which has a standard message. You can change the message into anything that you want. You can use your name, and leave a catchy message, and you can even sing a song if you want to. You have a wide range of options when changing your iPhone voicemail settings; you cannot only change the type of message, but also how to retrieve them, when you should be prompted, and a lot more. Part 1. How to Change and Record Voicemail Greetings on iPhone Part 2. How to Change the Voicemail Number on iPhone Part 3. Can I Recover A Deleted Voicemail on My iPhone Setting a voicemail greeting is important when we missed a call and let the people calling you know they have reached out to the right person and remind them to leave a message after the greeting. To record a personalized voicemail greeting, here are the steps that you have to follow. This action will lead you to the voicemail menu on the iPhone, and it will dial the voicemail service offered by your carrier. This is dependent on the carrier and also the plan that you have. You will have to follow the initial process given by the voice prompts from your carrier. This will allow you to record your greeting. If your carrier plan allows visual voicemail, you will see a "Set Up Now" button, which you should tap. Depending on your carrier, you will be asked for a password for your voicemail. Make sure that it is one that you can easily remember. Each carrier has a certain number of digits. You will be asked to repeat the password for it to become effective. Using visual voicemail, you can decide whether to use the "default" greeting or create a "custom" one. When creating a custom greeting, you will be allowed to review it before you confirm the recording. Simply click on the record button, and then click stop when you are done. Once you have reviewed it, you can click on "Save" to set it as your greeting. After you set your personal voicemail greeting, your iPhone dials a number to recover or access your voicemail. In this way, you can change the 9-digit voicemail number by following easy steps: On the keypad, type "*5005*86*0123456789#" – NOTE: "0123456789" is the number to which you want your voicemails to be sent to. Once you have entered the above number, tap the "Call" button, and the new number will be set. All your voicemails will be sent to the new number. That's it. As you can see, it is so easy to change voicemail number on the iPhone. Yes, it's possible to get your deleted voicemail back; losing an important voicemail is bad, but fortunately, we provide 2 possible ways for you to retrieve them back. Let's check them out! Step 2 Scroll down at the bottom of the page, you can see "Delete Messages", please tap on it. Step 3 Find the voicemail that you don't want to delete and tap "Undelete" to retrieve it back. For iPhone users, we recommend you to try dr.fone - Data Recovery to recover deleted messages and voicemail. Here we listed some key features to tell you why you should choose it. It supports all iOS devices: This means that you can use it to recover voicemail on iPhone, iPad, etc. Handy Preview feature: With this feature, you get a preview of the voicemails before recovering them. Full Data compatibility: This tool can access up to 18 different types of data. This makes it very versatile for the recovery of images, video, voicemail audio, and a lot more. Easy to use: The user interface is easy to follow, that even a novice will be able to handle it with ease. Allows for partial recovery: You can select the data that you want to recover. If you only want certain voicemail messages, you only select them and leave the rest. Download and install dr.fone on your computer, and also connect your device to with PC. There are three options list on the next screen; it's you choose one of them to scan the device, you can also choose file types to start scanning. Once you finished scanning, all the data that you deleted have been displayed on the screen. Find the voicemail that you would like to recover. After reviewing the deleted files' results, you can simply recover these files anywhere in your local directory. In this article, you have cleared how to record and change the voicemail number; and provide some solutions to recover deleted voicemail back. I hope you have already recovered your voicemail easily without any further loss. Hot Articles The Best Way to Recover Snapchat Messages on iPhone
You can also check your voicemail from the app, using the Calls category in Teams. Still need help? Contact Us Directions Emergency Info Privacy Policy Title IX HEOA Job Board 日本語 Deutsch English Español Português Français Log in Customer Support Home Software Software The HubSpot CRM Platform
5. Your voicemail will walk you through the setup process, including recording your personal greeting (the message that plays when you receive a call that goes to voicemail) and possibly your voice signature (your name, spoken by you into the recording).
I’m out walking my donkey but as soon as I get my ass back in I’ll call you back. Leave me a message.
how to set voicemail in iphone xr
how do i setup my voicemail box on this phone
how to setup my voicemail iphone 8
how to set up voicemail on samsung j3 verizon
Important: In some countries or regions, deleted messages may be permanently erased by your carrier. Your voice messages may also be deleted if you change your SIM card.
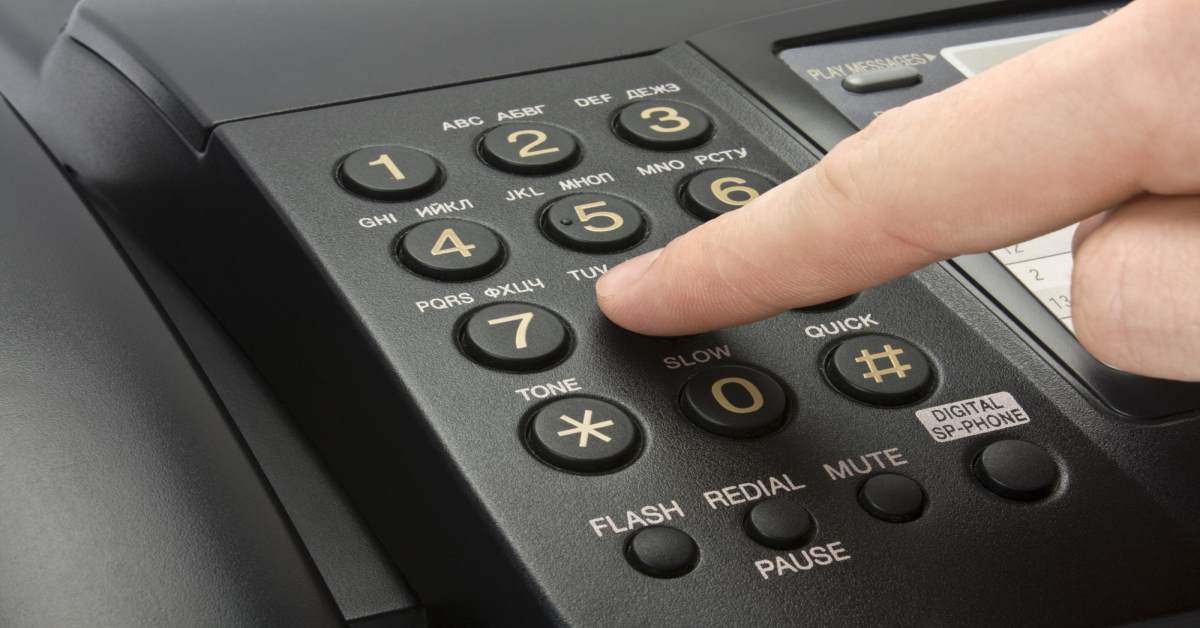
Setting up your voicemail. 1. Press and hold 1. 2. Enter your password if prompted. If you are asked for a password the first time you access your voicemail, just enter the last four digits of your phone number. 3. Follow the directions to set up your password. 4.
In this post, I’ll share what makes a good voicemail greeting — and the best voicemail greeting scripts you can use.
Website: https://www.thebalancesmb.com/essential-elements-of-good-voice-mail-greetings-2533548
“Good afternoon. You have reached the office of [your name]. I will be out of the office beginning on [date] and will be returning on [date]. Please leave a brief message with your contact information, and I’ll be sure to get back to you as soon as I return on [date]. If this is an emergency or you need to speak with someone before I return, please contact [name of colleague/supervisor], [their job title], at [their phone number].”
HomeAbout UsContactWrite for UsBloggingEntertainmentGamingHow-ToMobileReviewsTechnology Samsung Galaxy S9 Troubleshooting: Fixing the “Internet May Not Be Available” Error
how to setup a voicemail t mobile
how to setup voicemail yealink
how to set up voicemail on samsung a51 verizon
can't set up voicemail on iphone xr
You can tap on Record to start recording a new iPhone voicemail greeting and then Stop when you are done. Tap on Play to listen to it so you don’t have an embarrassing mistake or noise in it. When you are satisfied with the message, tap Save in the upper right.
Visual Voicemail lets you see a list of who left you messages and then play or read voicemail in any order. YouMail lets you access your visual voicemail on your phone, tablet, or computer. You can choose what to listen to, which ones to delete or save, and easily call or text people back.
If you can't set up Visual Voicemail, contact your carrier to make sure that your plan supports the feature.
Your phone rings, you see who’s calling, and wish you could send them straight to your customized voicemail message.
These are just a few ideas to get the gears turning. These are simple examples, but don’t be afraid to show a little personality.
We hope you enjoy this website. We've created informative articles that you can come back to again and again when you have questions or want to learn more!
can't set up voicemail on iphone 11
how to set up voicemail on iphone 8 xfinity
how to set up voicemail on iphone se 2020
how to set up voicemail message on yealink phone w56h
Android phones are made by a variety of different manufacturers, so saving voicemails differs slightly depending on the model you own. But there are some general steps you can follow to save those important messages.
Most similar apps will cost you for the recording alone and some limit recording time.
Website: https://aeneaswiener.com/visual-voicemail-with-automatic-transcription-and-tap-to-listen-f0983f00c5dd
What digital lifestyle questions do you have? Call Kim’s national radio show and tap or click here to find it on your local radio station. You can listen to or watch the Kim Komando Show on your phone, tablet, television or computer. Or tap or click here for Kim’s free podcasts.
01Hello this is [your name], I’m either on another call or away from my desk. Please leave your details, along with a short message and I’ll get back to you. This is created by individual staff for their specific number or extensions. It’s a great voicemail greeting for work when you are on another line or away from your desk.
Anyone who wants to easily save or backup voicemail to their computer or to an external drive. Launch iMazing and connect your device. In the left sidebar, select Phone > Voicemail. To view your most recent data, you may need to refresh your data.