*Note: Some of your users don’t celebrate all the same holidays you do. Remember to keep these voicemail greetings neutral 🌟
how to setup a voicemail on iphone att
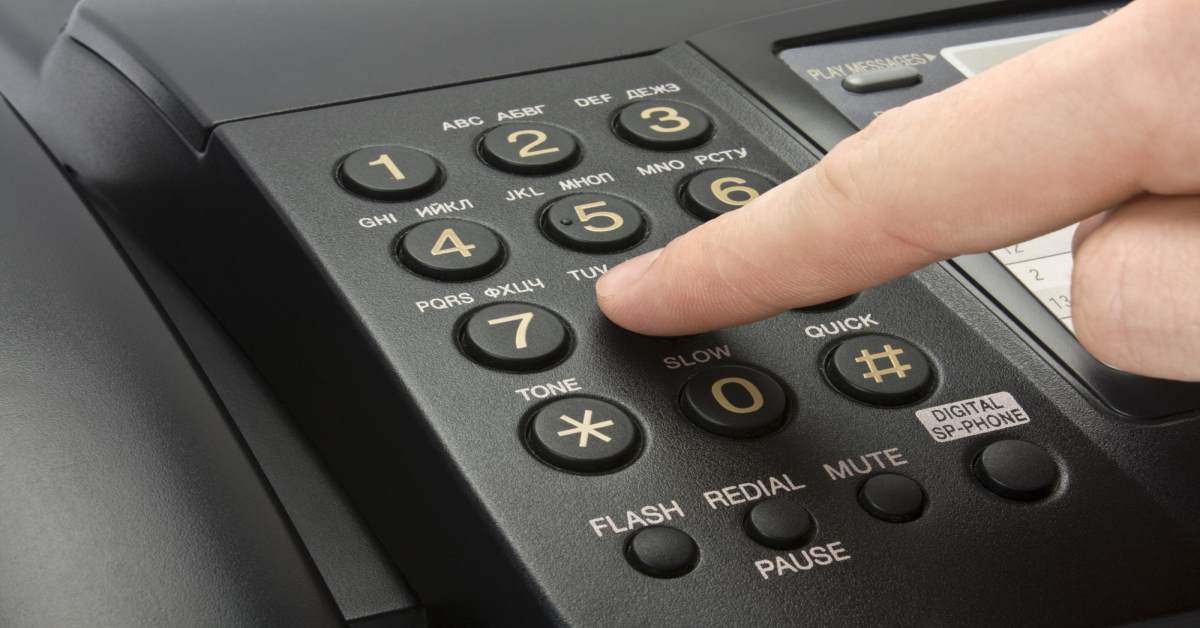
Voicemail access and the initial password should have been set by your carrier or service provider when your device was first activated. But keep in mind that some carriers don’t use passwords when it comes to voicemail. If you don’t know if this service is enabled or you forgot the password, you should check in with them first. If you see the contact list opening, tap on the phone dialer icon located in the bottom-right corner.Once you’re in keypad dialer, touch and hold on number 1 key. Now one of two things can happen. One, if you the service is enabled your phone will dial the voicemail number and prompt you to insert or create a new password. You might also be asked to record the greeting message at this stage. And two, in case your carrier didn’t configure this service when your device was first activated, you’ll be prompted with a message to insert your voicemail number. If the first scenario is the case, follow the instructions provided by your carrier to finish setting up your voicemail. In the event that you’re prompted to insert your voicemail number, tap on Add Number. If you don’t know your voicemail number, call your carrier and ask for it or search online for something like “voicemail number + *YourCarrierName* + *YourCountry*”. Now follow the instructions provided by your service provider to finish setting up your voicemail. Note: If you bought a used phone or you recently changed the service provider, chances are you have the wrong voicemail number set up. In cases like this, open up the App drawer and tap on Phone. From there, tap on More and select Settings. Once you’re in Settings, scroll all the way down to Voicemail settings and tap on the entry. This will open a pop-up in which you can change the voicemail number.
You can: Press and hold 1. Dial *86. Dial your Xfinity Mobile phone number. NOTE: If it's your first time calling into voicemail, follow the recorded instructions to create a voicemail PIN. You’ll then record your name and set up a greeting. After completing the setup process, follow the prompts to listen to your messages or change your
.
how to set up voicemail on a samsung a20
To improve a a business voicemail greeting, keep these eight rules at the forefront of the creative process: Avoid turning customers off with overused and impersonal phrases like “your call is very important to us..." Avoid leaving customers unsure by not immediately telling them the business, department, and/or person they’ve reached. Avoid leaving customers confused with too many details and complications; just keep it simple. Avoid messages longer than 25 seconds. Do apologize for being unavailable at the moment. Do invite the caller to leave a message. Do tell the caller when they can expect a return call and actually follow through within that timeframe. Do tell the caller about any applicable alternative options of contact and information- website, live chat, email, social media, or emergency numbers. Voicemail Greetings 101
4. Setting Up a T-Mobile Voicemail: Open your iPhone's Phone app. It's the white phone icon on a green background on the Home screen. Tap "Keypad". It's one of the options at the bottom of the screen.
how to setup my voicemail at&t
If you find that your business voice message is running a bit long, break it down into sections and decide which parts you can cut out to reduce the message’s length.
The basic rule of thumb is that callers should hear one of two things when they first connect with your voicemail — either an apology for not being able to answer the call or a “thank you” for having called. You can do both if you prefer, but keep it short and to the point.
how to set up voicemail in iphone india airtel
My wife and I can’t come to the phone right now, but if you’ll leave your name and number we’ll get back to you as soon as we’re finished.
how to set up voicemail message
how to set up voicemail on iphone 12
how to set up a voicemail in iphone 6
set up voicemail message telstra
how to set up voicemail on iphone 12 pro t mobile
how to set up my voicemail iphone 11
att set up voicemail iphone xr
can't set up voicemail on iphone
how to set up voicemail on iphone eight
can't set up voicemail on iphone
how to setup voicemail zoom phone
how to setup voicemail with rogers
how do i setup my voicemail on my iphone x
1. Call your number. It's that simple. Use any landline or cell phone to dial your mobile or landline number. Dial the full number. Make sure someone doesn't actually answer the phone you are calling when it rings, though. Make sure you dial the area code with the number.
how to setup your voicemail on iphone 6s
4. Reset your pin. Maybe you have forgotten your pin or passcode or you never set it up in the first place. This is a common issue. Most carriers have detailed instructions for changing passcodes. For example, to change a T-Mobile passcode, hold down the "1" key, then press the star key, and then press number 5 to go into passcode security. Then press 1, and you will be able to change your passcode. You can change your Sprint passcode online by choosing the my preferences tab and then the "things I can manage online" section. You can reset your pin by calling the carrier if you have forgotten it or never set it up at all. Some sites allow you to do this online. Filter Type All Time Past 24 Hours Past Week Past month Contact List Found1. 800.288.2020 New Contact Listing› Instrument Sales And Service Inc› Phonecom› Bac Credomatic› Google Play Services› 5 Best Email Name Generator Tools› Your Phone› Parental Controls› Adobe Photoshop› Citibank› Goformz› Btcl› Schneider National› Letter Of Recommendation› Roush Honda› Communication Breakdown› Genetworx› Call Center Representative Cover Letter› MsnbcBrowse All Listing » Frequently Asked QuestionsHow do you set up a voice message?
3. Hello, this is [your name]. I’m sorry I’ve missed your call. If you leave your name, number, and reason for calling, I’ll get back to you as promptly as possible.
Your PIN enables you to access your mailbox and calendar information through Outlook Voice Access . When you reset your PIN, a temporary PIN will be delivered to your email Inbox. Use the temporary PIN the next time you call Outlook Voice Access. You'll be prompted to create a permanent PIN at that time.
how do i setup my voicemail for the first time
TapeACall is one option if you’re looking to record the phone calls you make on your iPhone without having to create a new phone number. The app is only $11, making it a very reasonable investment for your business. In order to record a call on your iPhone with TapeACall, you basically create a conference call where one party is TapeACall.
You can also head to Settings → Wi-Fi → and toggle it off. Now try using voicemail.
You should now be familiar with the entire procedure for setting up voicemail on an iPhone.
how do i setup my voicemail on galaxy s5
iOS (the iPhone operating system) uses a system similar to Trash on a Mac, in that deleting a voicemail will remove it from view but not necessarily remove the file completely. If your iPhone is still picking up that file, it will show as not being able to be deleted.
When you select a voicemail, you can review and access details and other information—all on the right side of Teams.
If your iPhone has support (via your mobile carrier) for 3-way calling and Visual voice mail, you have an option for the cheapest workaround of all.
how to setup your voicemail on iphone 6
Android is a trademark of Google Inc. AndroidBeat.com is not affiliated with Google or any of the device manufacturers listed on this site. All images, logos and trademarks used on this site are property of their respective owners. We are an Android Enthusiast site.
After you reset iPhone voicemail password, you will be able to receive new voicemail messages. Besides the “iPhone Keeps Asking for Voicemail Password” error, I believe you would could across a lot of iPhone error or stuck. I think it would be safe to have a tool like Tenorshare ReiBoot at hand, so that you can fix iOS stuck and repair iOS system all by yourself. How to Fix iPhone keeps Asking for Password When Opening Apps Forgot iCloud Email Password, How to Recover It Bug & Fixes: Cannot Get Mail on iPhone 12/11/11 Pro(Max) Tenorshare 4uKey supports to remove screen time passcode without data loss. Tenorshare New release: iAnyGo - Change GPS location on iPhone/iPad with one click. Tenorshare 4MeKey: Remove iCloud activation lock without password/Apple ID. Support iOS 14. Home >> iPhone Fix >> iPhone Keeps Asking for Voicemail Password, How to Fix? Knowledge Base USB Debugging Android Roundup ReiBoot for iPhone iPhone Data Recovery Samsung Data Recovery Android Data Recovery
On the iPhone, go into voicemail and tap "Greeting". Record a few seconds of something and tap stop. Before you tap save, use iFuntastic or SFTP to navigate to /var/root/Library/Voicemail on your iPhone. You'll see a file called "Greeting. amr". This is the audio you just recorded. Delete that file and replace it with your custom message which should then be renamed to "Greeting.amr". Tap "Play" on the iPhone to verify your message works. If it plays, tap "Save" and your custom message will be uploaded to AT&T's servers.
Be Part Of Our Story!
how to set up voicemail on iphone youtube
4. Provide your voicemail system's password. You will be prompted to enter the passcode to your voicemail account, if you have set one (which, hopefully, you have).
how to set up voicemail on a samsung phone
Step 4. Begin recording your custom voicemail message by tapping “Record.” You can also listen to your recording by tapping “stop” and “play” before proceeding to the next step.
how to setup voicemail iphone rogers
3. Enter your Pin Number. You will need to know your pin or passcode in order to check your voicemail. If you don't have this code, you will have to retrieve it from your carrier. You will hear instructions to input your pin. Hit the pound key after you enter your pin. Follow instructions on how to listen to your voicemail. It's usually to push a certain number (like 1). That's all there is to it. You should be able to hear your voicemail messages now.
Contact Us
Setting up voicemail on your iPhone can be a confusing business. There's no voicemail app on your iPhone that provides quick access to the main voicemail options, so you'll need to check with your individual mobile network provider to see what voicemail options are available and how much they cost. However, there are a number of key features that you need to know about when using voicemail. Read next: How to stop iPhone calls going straight to voicemail
how to setup a voicemail on iphone xr
If they don’t leave a message, you’ll never know who called. Some people may assume they should just call back later. But if you prefer to get back to them at your leisure, encourage them to leave a message.
1.) You are connected to the mailbox of John Doe. Currently Mr. Doe can not be reached. You can call again at a later time or leave a message with your name and phone number that Mr. Doe can call you back as soon as possible.
Set up call forwarding To start forwarding your calls, click your profile picture at the top of Teams, then select Settings > Calls. Under Call answering rules, choose Forward my calls, and then select where you want your forwarded calls to go: voicemail, another person, or a call group.
You can record custom messages right from your dashboard using Dial-and-Record, which allows you to record it through your phone. Then, once they’ve been recorded, they’re saved in your account to be placed in any section, such as for the welcome greeting, menu prompt, or voicemail greeting, in addition to other sections. Enter the number of rings between 0 and 9, or press #. If you choose 0, calls will go straight to your voicemail without ringing first. If you choose # calls won't go to voicemail at all. The phone will ring until you answer or the caller hangs up. Follow the voice prompts.
To access voice mail settings in Outlook for PC, select File > Manage Voice Mail.
Unfortunately, you cannot currently send individual calls to voicemail on an iPhone without using a non-native app.
!
how to set up voicemail with iphone 11
how to setup your voicemail on an iphone 11
how to set up voicemail on samsung s10 at&t
how to set up voicemail on samsung j3
And if you find that you mute your phone accidentally, you need to unmute it then you can hear the sound. 1. For iPhone users, they can go to check whether the Ring/Silent switch is turned on. If the switch shows orange, that means your phone is in the silent mode so you need to toggle the button to turn on the Ring mode.
Just upgraded to iOS 15? Here are the first new options you should set up to get the most out of the update.
Hey, I was having the same issue and i reset the network and magic, it came back up….thanks for the information
Good professional voicemail greeting examples. A business named Lorem Ipsum, which sells widgets, wants to leave a brief message that confirms for the listener that they have called the right business. The message would also prompt the caller to provide information needed to return the call, and throws in a nice quick promotional note.
Simply speak into your phone or computer while recording a greeting with your business phone service. If you need to create your own audio file, the voice memo app on your phone should do fine.
My voicemail was set up at the store. I can’t hear my voicemail messages. What do I need to do to hear messages once I hit play? June 16, 2021 at 5:02 pm July 29, 2021 at 2:15 pm August 25, 2021 at 12:11 am Necessary cookies are absolutely essential for the website to function properly. This category only includes cookies that ensures basic functionalities and security features of the website. These cookies do not store any personal information. Non-necessary Any cookies that may not be particularly necessary for the website to function and is used specifically to collect user personal data via analytics, ads, other embedded contents are termed as non-necessary cookies. It is mandatory to procure user consent prior to running these cookies on your website.
how to set up a voicemail on iphone 11
how to setup your voicemail on a tracfone
how to setup voicemail for iphone xr
how to set up voicemail on iphone 11 pro max at&t
After setting the number on your voicemail, you must also record a personal voicemail greeting. Follow the steps below. Start the Phone app. if you don’t see the numeric keypad, tap “Keypad” at the bottom of the screen. Tap and hold the “1” for about two seconds until the phone automatically calls voicemail. Immediately tap “3” to access voicemail settings. Listen to the options. On most voicemail systems, tap “2” to start the process to record a new greeting. The current personal greeting will play; then tap “2” again to record a new greeting. Say the greeting you want, and tap “#” when you’re done. To save the greeting, tap “1.” The personal voicemail greeting has been set. Hangup the phone. How to setup voicemail using a Visual Voicemail Applications
how do i set up my voicemail iphone xr
Sign up to receive the latest and greatest articles from our site automatically each week (give or take)...right to your inbox.
The *78 feature should override this permanent diversion, and an incoming call to the landline phone should be immediately bypassed without ringing (or perhaps ring once, like it used to do before NBN) and diverted to the mobile and ring long enough (more than the default 6-8 secs) to be picked up by the recipient or picked up by the mobile's ...
To delete a message, swipe it left. To delete more than one at a time, tap Edit in the top right corner. Then select the messages you'd like to delete, then tap Delete in the bottom right corner.
“Congratulations! You’ve reached the right person! It’s [your name]. Unfortunately, you’ve called at the wrong time. Please leave a message with all your contact information, and I’ll call you back within 24 hours.”
2. Phone me after 8 o`clock. .. (we / finish) dinner by then. 3. Tomorrow afternoon we`re going to play tennis 3 o`clock until 4.30.
how do i setup my voicemail on my iphone xr
how to set up voicemail message on huawei
how to set up voicemail iphone xs max
how to set up voicemail message on lg phone
Related ReadingsHow to Change or Reset Voicemail Password on iPhone: Verizon, AT&T, Sprint, T-MobileHow to Change Voicemail on iPhone 12Pro Max, XR, 11(Pro Max), XS Max (Voicemail Greetings Message)Setup Professional Voicemail Greetings on iPhone With Examples: Personal, Business and Busy4 Fixes iPhone Voicemail Call Failed in 2021: iPhone 12(Pro, Max, Mini),11 Pro Max, XR, XS Max,X,8,7,6S,6,SE
HI All . I am facing an issue. whenever we are tryimg to call from location A to location B, the phone rings just once and then dropped. After performimg some R&D, we found that the issue is happening with only one phone model type, all other phone model type working fine. Nov 26, 2008 · To busy out the port, find 4405 on the frame (its 66 block is on the top row, second column from left) and connect a butt set to it. At the dial tone, dial *1. Disconnect the butt set after you receive a fast busy and then test that calls to voicemail now roll over normally to the beginning of the group. Adding Line Cards
Phones Tablets Wearables Reviews Tips & Tricks How-Tos Software Apps Root How To Record Calls On Samsung Galaxy A51, A71, A31, A11, A41, A21, and A01 Posted by Asif Shaik on May 31, 2020 in How To, Samsung
6. Hello, this is [your name] at [your company]. I am unavailable at the moment, but please leave your name, number, and the reason you’re calling, and I’ll call you back as soon as possible.
Random facts could include their favorite movie, vacation spot, candy, or television show. Regardless of what you choose, it will surprise your caller and more than likely make them leave a message if they were considering hanging up.
4. Estill Voice Training Courses (Estill) The courses listed in this training are suitable for all those who want to make a living out of their voice, be it singers, actors, voice trainers, public speakers or You Tubers.
how do i set up voicemail message
how to setup a voicemail rogers
can't set up voicemail on my iphone
how to set up voicemail iphone 8 t mobile
“Hey, there! This is [your name]. Please leave me a message with your name, number, and the reason you’re calling. If you also tell me [insert random fact] I’ll be sure to move you to the top of my call list. Have a great day!”
To set up your voicemail, press *98 from your home phone or call the retrieval number you received with your welcome letter. Voice prompts will guide you through the rest of the steps.
Come to rely on voicemail to catch your messages, and it’ll be frustrating when it suddenly stops working.
This website uses cookies to improve your experience while you navigate through the website. Out of these cookies, the cookies that are categorized as necessary are stored on your browser as they are essential for the working of basic functionalities of the website. We also use third-party cookies that help us analyze and understand how you use this website. These cookies will be stored in your browser only with your consent. You also have the option to opt-out of these cookies. But opting out of some of these cookies may have an effect on your browsing experience. Necessary cookies are absolutely essential for the website to function properly. This category only includes cookies that ensures basic functionalities and security features of the website. These cookies do not store any personal information. Any cookies that may not be particularly necessary for the website to function and is used specifically to collect user personal data via analytics, ads, other embedded contents are termed as non-necessary cookies. It is mandatory to procure user consent prior to running these cookies on your website. Eastern Oregon University > Coronavirus Information > Archives > March 24, 2020 – Voicemail and phone instructions when working from home March 24, 2020 – Voicemail and phone instructions when working from home Voicemail and phone settings while working remotely
Step 5. Tap “Stop” to end the recording. Then, tap “Save.” You can open your recordings in the top-right corner of the screen.
If you have a call forwarding set up, it is likely to cause conflicts with voicemail. To turn off Call Forwarding or make sure it is not enabled:
how to setup voicemail koodo
how to set your voicemail on iphone 6
how to setup voicemail on iphone 8 att
how to set up voicemail on iphone 8 xfinity
I have an old picture frame voice recorder that had a cherished voice recording on it. It was accidently deleted yesterday. Is there any way to retrieve the old recording? The recording and play button were pressed several times thinking the recording might possibly work again, but no recording was added. Is it possible to retrieve that old recording or is lost forever?
10. Once you're happy with your recording, click "Save" on the top right-hand corner.
A good voicemail greeting is short and professional, lets people know that you’ll get back to them, and invites callers to continue engaging with a call-to-action. You should also show your personality if you’re in an industry or role that allows that. If your industry is more conservative, however, you’ll want to keep humor and personal touches to a minimum. A greeting Your name Your company A simple explanation for missing the call (e.g. you’re away from the phone or are on holiday) A rough estimate of when you’ll get back to the person An alternative person to reach out to (if you’re out of office) An alternative mode of communication (if you prefer email or text) A call-to-action such as “Leave a message” or “Send me an email at [email protected]”
The earliest voicemail applications have been purchased by other messengers, and now there are new, but little known ones. We have selected 11 free and convenient voice mail applications for you, designed for iOS and Android. YouMail. Visual Voicemail & Missed Call Alerts – InstaVoice. AT&T Voicemail Viewer.
Recent Posts How to reset a Trio tablet – Simple guide to factory reset your Trio Best Tablet For 3DR Solo – Top Compatible Tablets in 2021 Best Wireless Charger for Note 5 – Top Qi-Certified Chargers in 2020 How to change Snapchat notification sound – quick and simple steps Best wireless charger for LG G6 – Get the perfect charger in 2020
4. By default, your voicemail will be setup with your carrier's generic greeting.
how to set up voicemail samsung j7
how to set up voicemail on iphone se verizon
how to setup your voicemail on iphone xr
Xhow to set up voicemail on iphone 12 pro max t mobile