When customers are trying to reach a specific person who is unavailable, personal business voicemail greetings can be used to make that personal connection or forward their calls to employees’ remote phones and numbers.
how to make a custom voicemail from a video
If your recording is vague, confusing, or drags on, customers will lose interest and hang up the phone instead of leaving a voicemail message. To help you create an effective after hours announcement, here are some best practices and sample scripts you can employ.
Who We Are Our Team CEO Message Why Bralin? Why Us? Client Feedback Case Studies Referral Program Contact Us Our Services Managed IT Services Network Security Email Security Solutions Cloud Consulting Microsoft Office 365 Consulting Technology Advisors Business Continuity Fortress Where We Go Media Centre Our Blog Our Videos Need Help?
.
get a professional voicemail greeting
Tripboba.com - Voicemail is a voice message that a caller will leave to your mailbox when you’re absent or busy with another conversation. The same goes if you’re trying to call someone else and they don’t answer. You can leave a voice message and they will receive the mail, allowing them to hear what you want to say.
Written by Aja Frost @ajavuu
how to create your own voicemail on iphone 7
12. "Hi, you've reached [company]. We're available by phone from [hour] to [hour] [time zone] Monday through Friday [optional: and from hour to hour on the weekends]. You can also contact us by going to our website, [URL], and live-chatting or emailing us. If you'd like us to call you back, please leave your name and number after the tone."
Our TIPP: Our prompts configurator helps you find the right voice and also helps you with text suggestions, selection of music and speakers demos. With just a few clicks, you can compile your selection or desired prompt(s) and send it to us.
get a professional voicemail greeting
41 Funniest Voicemail Greetings in the World. Many years ago, in a time before cell phones (Yes it exists, and I remember it!) I used to get inundated with phone calls to my landline at all times of day and night.
creative voicemail greetings
professional greeting for voicemail
different voicemail greetings for different callers iphone
different voicemail greetings for different callers iphone
how to set a custom voicemail
how to make your own voicemail message
professional greeting for voicemail
how to change cox voicemail greeting
professional voicemail greeting template
how to delete greeting on voicemail
professional voicemail greeting for job seekers
professional voicemail greeting holiday
how do i make my own voicemail message
You can also save your Visual Voicemail messages as notes or voice memos, or share them using Messages, Mail, or Airdrop. Published Date: April 30, 2021 Ask other users about this article Ask other users about this article See all questions on this article Support Set up Visual Voicemail on your iPhone App Charts Apps of the Week Apps of the Month Games of the Week Games of the Month Gadget Deals Gadget Guides Gadget Reviews The Best Gadgets About AppAdvice About our staff We are hiring Follow us on Twitter App Charts Apps of the Week Apps of the Month Games of the Week Games of the Month
professional voicemail greeting for cell phone
Don't like the new position of the iOS 15 Safari Address/Search bar? Here's how to move it back to the top.
This website uses cookies. If you continue to use the website, we will assume your consent.OKPrivacy Policy / Read more
Choose a greeting—Default or Custom; if you choose Custom, you can record a new greeting.
voicemail greeting voice
Turn your phone off for 10 seconds and then back on. Place a test call to 611. Do one of the following: If the test call is successful, press and hold 1 to dial into the voicemail system. If your test call fails, confirm you have wireless coverage. If Visual Voicemail won't download, press and hold 1 …
24. "Thank you for calling [company]. We're closed for [holiday] from [date] until [date]. Please leave your message and we'll get back to you as soon as possible. Have a happy holiday season!"
At present, you have to record your greeting by recording directly into the iPhone microphone -- the results of which are average, of course.
professional voicemail greeting for job seekers
While recording a message, make sure that you don’t yell into the phone and make sure you record in a quiet place. Setting this up in a restaurant will make your iPhone voicemail greeting sound like you are actually picking up the phone.
When autocomplete results are available use up and down arrows to review and enter to select. Touch device users, explore by touch or with swipe gestures.
Departments and teams are typically organized by function – customer service, tech support, sales, billing questions, etc. When a team is busy handling other calls, encourage your callers to leave a message and reassure them that you will get back to them within a reasonable time frame. It’s important that you actually follow through to avoid upsetting your callers.
professional voicemail greeting download
I have a confession to make: I haven't recorded a new voicemail greeting in nearly a decade. Since then, I've (hopefully) become more articulate, poised, and self-assured. But hear my voicemail recording, and you'd think I was still new to the work world, a little unsure of myself — and probably not an authority.
17. “Happy Holidays from [company name]. Our hours are a little bit different this holiday season. [List hours]. We hope it’s not an emergency, but if so, we’ve got you covered. Contact us at [company email/other support lines] and we’ll get back to you ASAP. For all other inquiries, we’ll contact you when we are back from the holiday – we might be a few pounds heavier but eager to speak with you! Happy Holidays.” Things happen during the holidays, we know. Let your callers know you are still there just in case!
Since we like to give our customers what they want, we’ve been burning the midnight oil looking for a way to make personalized greetings that much easier to personalize.
Be Part Of Our Story!
personalised voicemail greetings
This article will introduce you how to change voicemail messages/greetings and voicemail number on iPhone 7/SE/6s/6/5s/5c/5/4s/4/3GS. Read below and give it a try. Of course, you can change the voicemail on your iPhone and set it to whatever you want. Your carrier will give you a voicemail box, which has a standard message. You can change the message into anything that you want. You can use your name, and leave a catchy message, and you can even sing a song if you want to. You have a wide range of options when changing your iPhone voicemail settings; you cannot only change the type of message, but also how to retrieve them, when you should be prompted, and a lot more. Part 1. How to Change and Record Voicemail Greetings on iPhone Part 2. How to Change the Voicemail Number on iPhone Part 3. Can I Recover A Deleted Voicemail on My iPhone Setting a voicemail greeting is important when we missed a call and let the people calling you know they have reached out to the right person and remind them to leave a message after the greeting. To record a personalized voicemail greeting, here are the steps that you have to follow. This action will lead you to the voicemail menu on the iPhone, and it will dial the voicemail service offered by your carrier. This is dependent on the carrier and also the plan that you have. You will have to follow the initial process given by the voice prompts from your carrier. This will allow you to record your greeting. If your carrier plan allows visual voicemail, you will see a "Set Up Now" button, which you should tap. Depending on your carrier, you will be asked for a password for your voicemail. Make sure that it is one that you can easily remember. Each carrier has a certain number of digits. You will be asked to repeat the password for it to become effective. Using visual voicemail, you can decide whether to use the "default" greeting or create a "custom" one. When creating a custom greeting, you will be allowed to review it before you confirm the recording. Simply click on the record button, and then click stop when you are done. Once you have reviewed it, you can click on "Save" to set it as your greeting. After you set your personal voicemail greeting, your iPhone dials a number to recover or access your voicemail. In this way, you can change the 9-digit voicemail number by following easy steps: On the keypad, type "*5005*86*0123456789#" – NOTE: "0123456789" is the number to which you want your voicemails to be sent to. Once you have entered the above number, tap the "Call" button, and the new number will be set. All your voicemails will be sent to the new number. That's it. As you can see, it is so easy to change voicemail number on the iPhone. Yes, it's possible to get your deleted voicemail back; losing an important voicemail is bad, but fortunately, we provide 2 possible ways for you to retrieve them back. Let's check them out! Step 2 Scroll down at the bottom of the page, you can see "Delete Messages", please tap on it. Step 3 Find the voicemail that you don't want to delete and tap "Undelete" to retrieve it back. For iPhone users, we recommend you to try dr.fone - Data Recovery to recover deleted messages and voicemail. Here we listed some key features to tell you why you should choose it. It supports all iOS devices: This means that you can use it to recover voicemail on iPhone, iPad, etc. Handy Preview feature: With this feature, you get a preview of the voicemails before recovering them. Full Data compatibility: This tool can access up to 18 different types of data. This makes it very versatile for the recovery of images, video, voicemail audio, and a lot more. Easy to use: The user interface is easy to follow, that even a novice will be able to handle it with ease. Allows for partial recovery: You can select the data that you want to recover. If you only want certain voicemail messages, you only select them and leave the rest. Download and install dr.fone on your computer, and also connect your device to with PC. There are three options list on the next screen; it's you choose one of them to scan the device, you can also choose file types to start scanning. Once you finished scanning, all the data that you deleted have been displayed on the screen. Find the voicemail that you would like to recover. After reviewing the deleted files' results, you can simply recover these files anywhere in your local directory. In this article, you have cleared how to record and change the voicemail number; and provide some solutions to recover deleted voicemail back. I hope you have already recovered your voicemail easily without any further loss. Hot Articles The Best Way to Recover Snapchat Messages on iPhone
iphone 6 custom voicemail not working
Set Up Your VoicemailWebex | VoicemailCalling User Portal | Listen to Your Voice MessagesCheck Your VoicemailManage Voicemail Settings for a Webex Calling User
what to say on greeting voicemail
Apple Says Fix Planned for 'You Do Not Have Permission to Open the Application' Error When Using a Scanner on Mac [Updated]
Contact Us
Thank you for calling [LinkedPhone – Where Freedom Rings!]. You’ve reached us outside of business hours. Please select from one of the following options: [for business hours press 1; to leave a message press 2; if this is an emergency, press 0 to be directed to our 24-hour customer success team.] We are grateful for your call and we look forward to speaking with you soon!
how to set a custom voicemail on samsung
Professionally recorded messages also increase your game by giving your business the polished, professional appearance your customers expect. Want to learn more? Get in touch with us.
4. Hello… pause. Hello… long pause. Who is this? long pause again Is anyone on the line?… long pause and beep sound.
With notifications, you're alerted when you miss a call or receive a voice mail message. You can decide how and when you want to be alerted. For example, you can receive an email when you miss a call or get a text message when someone leaves a voice mail. By default, you'll receive an email anytime you miss a call, but text messaging notifications are turned off.
3. Voicemail greetings for the customer s ervice phone number. Customers will eventually need help from your business. If your customer service team is unavailable for calls, you can use the customer service voicemail recordings below.
“Hello, it’s me. I was wondering if after all these years you’d leave a message at the beep. Hello, can you hear me? I’m in California dreaming about the message that you’ll leave. Hello from Ellen.”
You could also record a custom greeting in a visual voicemail app, if you have one installed.
!
how to make your own custom voicemail
professional voicemail greeting recording
why can't i save my custom voicemail
professional voicemail greeting vacation
If there are other ways to get in touch with your business, or receive information about your products, you may want to include them in the after hours greeting. Websites and emails are often the most popular forms of alternative contact.
Voicemails don’t necessarily have to be monotonous or extremely jazzy or funky. What you should be looking for is a balance between the two. Whenever you call someone and their voicemail greeting is playing, it tells you a lot about who they are, as a person. Which is why, you’ve got to put a little bit of “you” when it comes to voicemail. And the best part about all of this is, since you couldn’t come to the phone, at least the callers are having a good time listening to the message.
We are unable to come to the phone right now. At the tone, please leave your name, number, and Master Card, Visa, or American Express account number and we’ll get back to, pending credit approval.
2. Once there, tap on "Greeting" in the top-left corner. Your iPhone will take a few moments to fetch and load your current voicemail greeting, which you can play using the controls in the middle of the page.
In Microsoft 365, you can record a greeting, edit call answering rules, set up Outlook Voice Access, edit text message and email notification settings, and turn on voice mail preview using Outlook on the web.
Website: https://www.voxist.com/voxist-now-lets-you-write-your-own-personalized-greetings-and-automaticallys-greet-your-callers-by-name/
what is a professional voicemail greeting
how to make a custom voicemail 2020
why is my custom voicemail not working
messenger is not playing voice message
If someone is listening to your voicemail greeting it's only because they intend to leave you a message. Don't make them listen to 3 minutes of rambling in order to do so. Plus, you're more likely to deliver a clean, professional read if you stick to shorter greetings. If more specific information is needed, direct callers to where they can find it on your website.
iphone x custom voicemail not working
Smith.ai Virtual Receptionists service can answer all your calls, 24/7. We recommend 24/7 answering, as a real person on the line can help you capture and convert more leads and build trust with your existing clients. But if you have decided to limit our services to certain hours, you can upload a custom voicemail message in our system for "after-hours" callers. Here's how:
FREE auditions of voicemails. It's been proven that by using a professional voice actor that callers will stay on hold longer, resulting in more sales and higher conversions. We list the same voices that appear on phone greetings, voicemail, IVR's, on-hold messages for thousands of companies. The Voice Realm offers you the opportunity to upload
our voice over artists. Snap Recordings has over 100 professional, industry-leading voice talents available. Pick a language, select a voice-over artist and click the play buttons to hear samples of their professional phone greetings, voice prompts and messages on hold. Voice Talent Player.
With Visual Voicemail, you can see a list of your messages and choose which ones to listen to or delete. Learn how to set up and transfer your existing voicemail. Create a voicemail password, then tap Done. Enter your password again to confirm it, then tap Done. Select Custom or Default. If you choose Custom, you can record a new greeting. Go to the Phone app, then tap the Voicemail tab. Tap Set Up Now. Enter your password,* then tap done. Record a custom greeting or use the default greeting, then tap Save.
When your small business is closed, ensure that your callers know that! If appropriate, you might want to reiterate your business hours to manage callback expectations.
professional voicemail greeting download
voicemail greeting mp3
voicemail greetings pre recorded
how to record a professional voicemail greeting
Rules are listed in the order applied, so select the rule you want to move up or down in the order and click the arrows.
Did you accidentally lock your iPhone? Well then read the article to know the best ways to reset your iPhone without using iTunes or Passcode. 4 Solutions to Fix iPhone Calendar not Syncing with iCloud Problem
9.) Bem-vindo a John Doe. Infelizmente, não há ninguém no escritório no momento. Por favor, deixe seu nome e número de telefone após o sinal. Vamos ligá-lo de volta o mais rápido possível.
In certain situations, it’s a good idea to let a call go to voicemail. If you’re in a loud area, unable to spend 10-15 minutes talking, or are otherwise distracted, don’t answer. Recruiters who cold-call candidates will understand that you’re simply unavailable – but make sure to return calls in a timely manner. If possible, call back during regular business hours.
Website: https://www.voicemail-greetings.com/000-selection-of-voicemail-greetings.html
Hello! Thanks for calling [LinkedPhone. We’re currently tied up assisting other entrepreneurs & small businesses at the moment]. But please leave your name, number, and the reason for your call and we will get back to you as soon as possible. We look forward to working with you. Thank you.
what is an example of a professional voicemail greeting
custom voicemail not saving
personalized voicemail greetings
how to hear your own voicemail message
Greetings; Funny; Funny Voicemail Funny Voicemail sorry but nobodys available to answer you call at this time.if you'd like to leave a message please wait for the beep, then press #, then so on..great This is a free greeting. Sign in or sign up to use! Want a ringtone instead? Send it to your phone. Comments On This Greeting ( 16 ) At 6
Translation: If you sound unsure, then your current clients, prospects, and partners won’t be so sure about you either.
What is the best voicemail greeting? 20 creative and funny voicemail greetings to try today (listen+download ) What you need to record creative voicemail greetings. How do I personalize my voicemail? Ok, it’s a joke! But many customers still get the feeling that they’re kind of being neglected when your phone …
14. "Hello, you've reached the Sales Department at [Company name]. All of our representatives are currently helping clients [insert goal such as, 'achieve 40% growth through streamlining HR operations'] and are unable to take your call. Please leave your name, company, and phone number and we'll give you a call back ASAP. Thank you!"
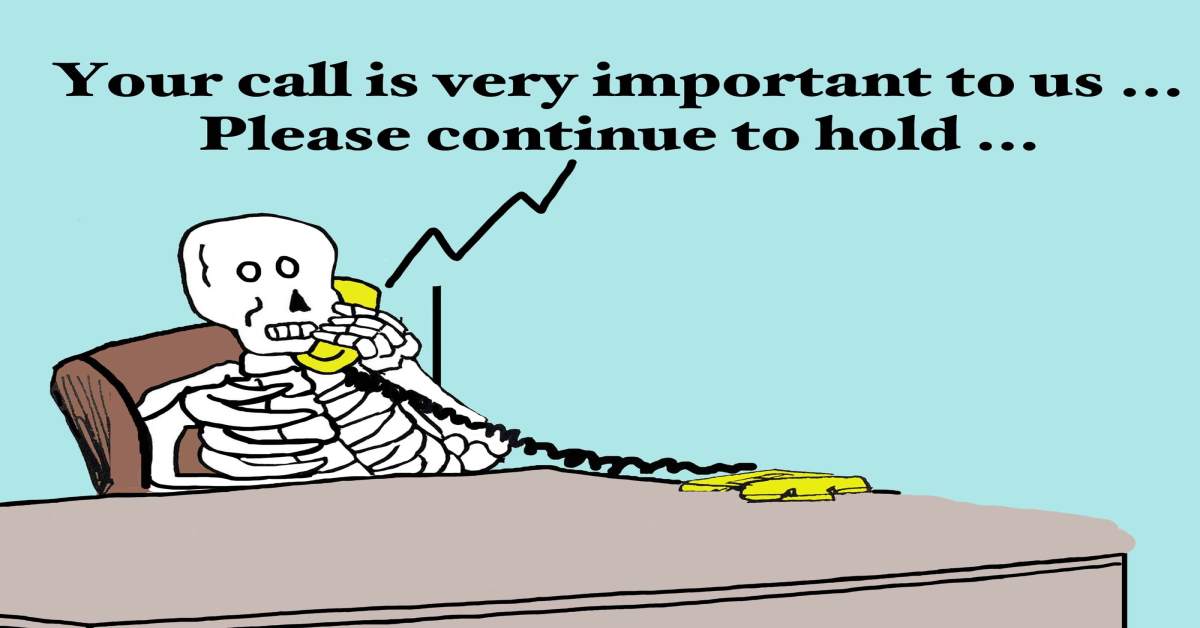
Once you finish your voicemail message, you can end on a note of gratitude and express thanks or that you realize the recipient of the message us busy, so you’d appreciate a return call. Whichever way you choose, make certain that the tone of your message is upbeat. A business voicemail greeting sees each call as their chance to engage with their clients or vendors. Hello, you’ve reached the office of Lydecker and Lydecker. We are currently unavailable to answer your call. However, your call is important to us, so please leave your name, phone number or email address, and a brief message and we’ll get back to you as soon as possible. Thank you for your interest in Lydecker and Lydecker Law Offices. Professional tone Provide the caller with specific information Request the caller to leave specific information Extend gratitude for their call Professional Voicemail Greetings
11.) Bem-vindo a John Doe, infelizmente, você nos ligou fora do horário comercial ou não podemos atender a sua chamada no momento. Se você quiser nos deixar uma mensagem, por favor envie um e-mail para [email protected] - Entraremos em contato o mais rápido possível. Para mais informações sobre nós, por favor visite o nosso site www.johndoe.de. Muito obrigado pela sua ligação.
teams upload voicemail greeting
professional voicemail greeting on cell phone
custom voicemail sample
asterisk voicemail greeting location
Of course, this option is only available for those brave enough to hack their iPhone.
10.) Bonjour, et bienvenue chez John Doe. Pour des raisons techniques, nous ne pouvons pas prendre votre appel personnellement. Merci de votre compréhension. Nous essayons de trouver une solution. Si vous le souhaitez, vous pouvez laisser un message sur notre page d'accueil www.johndoe.de - Merci et au revoir.
Another worth considering trick is to remove all the old voicemails that are consuming the storage and creating multiple dilemmas like this. To delete the voicemail here are the steps, Open the Phone app. Tap on Voicemail at the bottom tab. Then tap on Edit at the top-right screen. Select All the Voicemails and at last tap Delete.
When asked to press a number, pause on the phone/mic icon and click a number under the DIAL PAD tab.
The default, generic voicemail greeting that comes with your iPhone is fine but also rather bland and boring. You can personalize the voicemail greeting on iPhone by recording your own custom version of it. This is a tutorial on how to create a custom iPhone Voicemail greeting.
Here are 15 business voicemail greetings to keep your clients and boost your credibility: